> ## Documentation Index
> Fetch the complete documentation index at: https://docs.nekt.com/llms.txt
> Use this file to discover all available pages before exploring further.
# Pinecone as a destination
> Send your data from Nekt to Pinecone.
Pinecone is a vector database designed for AI and machine learning applications. It provides tools for storing, searching, and managing vector embeddings, enabling semantic search, recommendation systems, and other AI-powered features that require similarity matching and vector operations.
## 1. Add your Pinecone access
1. In the [Destinations](https://app.nekt.ai/destinations) tab, click on the "Add destination" button located on the top right of your screen. Then, select the Pinecone option from the list of connectors.
2. Click **Next** and you'll be prompted to add your access:
* **API Key:** Your Pinecone API key, generated on the Pinecone platform.
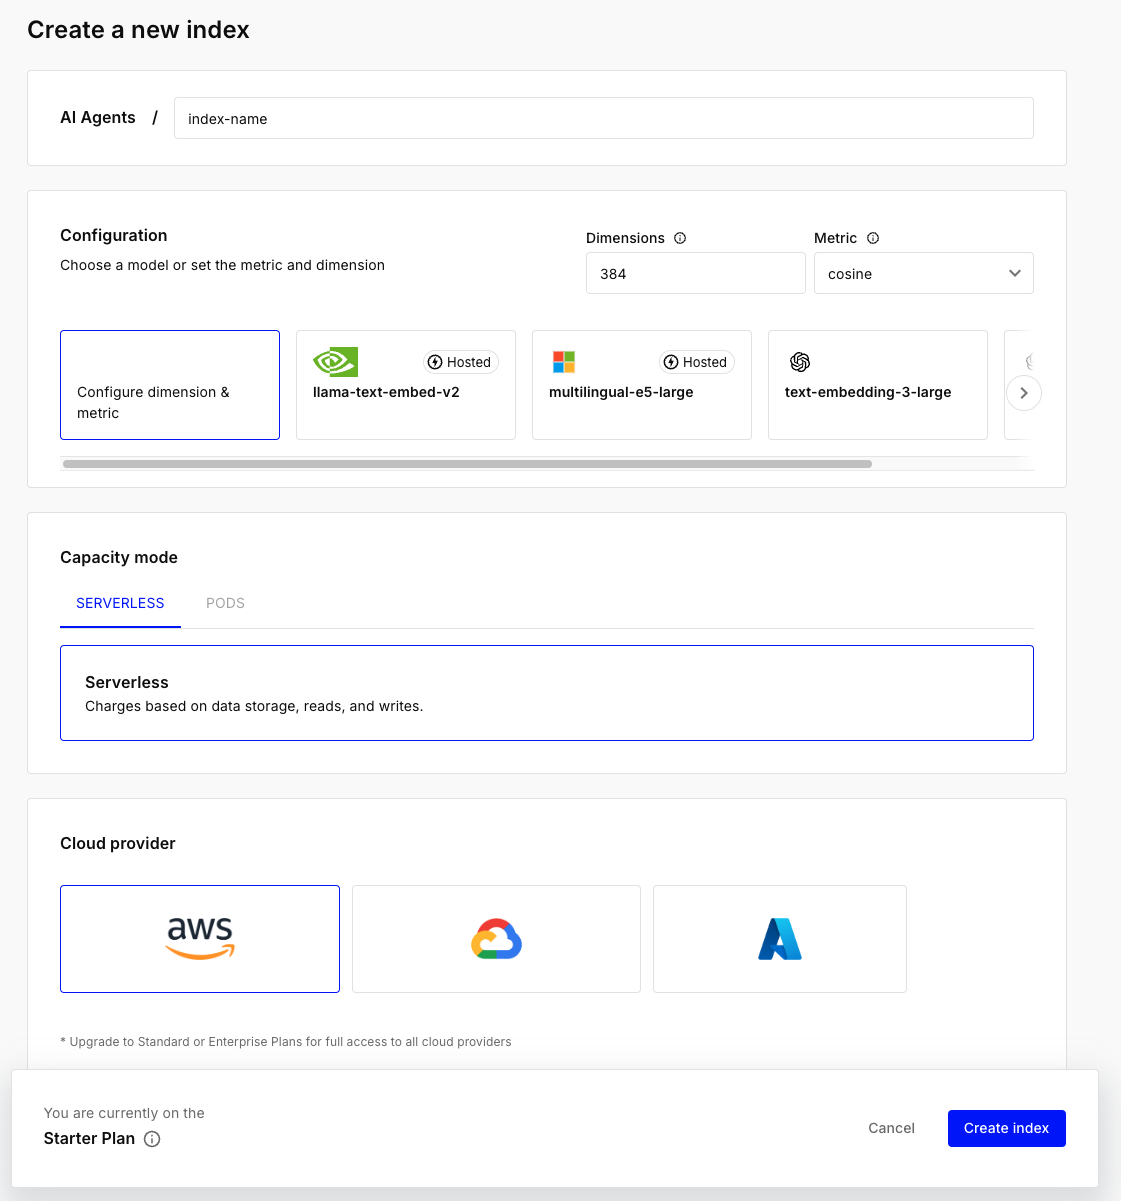
 * **Index name:** The Pinecone index where your data will be written. Your index is created on the Pinecone platform and must have a specific dimension:
1. Select the Custom Settings checkbox in the Configurations section.
2. In the Dimension field, enter **384**.
3. Leave all other fields with their default values.
For more details, refer to [Pinecone's documentation](https://docs.pinecone.io/guides/indexes/create-an-index)
* **Index name:** The Pinecone index where your data will be written. Your index is created on the Pinecone platform and must have a specific dimension:
1. Select the Custom Settings checkbox in the Configurations section.
2. In the Dimension field, enter **384**.
3. Leave all other fields with their default values.
For more details, refer to [Pinecone's documentation](https://docs.pinecone.io/guides/indexes/create-an-index)
 * **Namespace:** The namespace used in vector stores. It is a string that identifies data within the specified index, and you can define it as needed.
3. Click **Next**.
## 2. Select your data to send
1. The next step is letting us know which data you want to send to Pinecone. Select the tables or even entire layers, sources or transformations to send more than one table.
> Tip: The resource can be found more easily by typing its name.
2. Click **Next**.
## 3. Configure your Pinecone data destination
1. Describe your destination for easy identification within your workspace. You can inform things like what data it sends, to which team it belongs, etc.
2. To define your [Trigger](https://docs.nekt.com/runs/scheduling-and-triggers), consider how often you want data to be sent to this destination. This decision usually depends on how frequently you need the new table data updated (every day, once a week, only at specific times, etc.).
3. Click **Done**.
### Check your new destination!
1. Once completed, you'll receive confirmation that your new destination is set up!
2. You can view your new destination on the [Destinations](https://app.nekt.ai/destinations) page. Now, for you to be able to see it on your Pinecone platform, you have to wait for the pipeline to run. You can monitor it on the [Destinations](https://app.nekt.ai/destinations) page to see its execution and completion. If needed, manually trigger the pipeline by clicking on the refresh icon. Once executed, your data should be seen on Pinecone.
> If you encounter any issues, reach out to us via Slack, and we'll gladly assist you!
* **Namespace:** The namespace used in vector stores. It is a string that identifies data within the specified index, and you can define it as needed.
3. Click **Next**.
## 2. Select your data to send
1. The next step is letting us know which data you want to send to Pinecone. Select the tables or even entire layers, sources or transformations to send more than one table.
> Tip: The resource can be found more easily by typing its name.
2. Click **Next**.
## 3. Configure your Pinecone data destination
1. Describe your destination for easy identification within your workspace. You can inform things like what data it sends, to which team it belongs, etc.
2. To define your [Trigger](https://docs.nekt.com/runs/scheduling-and-triggers), consider how often you want data to be sent to this destination. This decision usually depends on how frequently you need the new table data updated (every day, once a week, only at specific times, etc.).
3. Click **Done**.
### Check your new destination!
1. Once completed, you'll receive confirmation that your new destination is set up!
2. You can view your new destination on the [Destinations](https://app.nekt.ai/destinations) page. Now, for you to be able to see it on your Pinecone platform, you have to wait for the pipeline to run. You can monitor it on the [Destinations](https://app.nekt.ai/destinations) page to see its execution and completion. If needed, manually trigger the pipeline by clicking on the refresh icon. Once executed, your data should be seen on Pinecone.
> If you encounter any issues, reach out to us via Slack, and we'll gladly assist you!