> ## Documentation Index
> Fetch the complete documentation index at: https://docs.nekt.com/llms.txt
> Use this file to discover all available pages before exploring further.
# Qlik Sense
> Connect Qlik Sense to your data in Nekt for analysis and dashboards.
Connect Qlik Sense to your data in Nekt. How you connect depends on your cloud deployment.
| | Connector | Notes |
| :--------------- | :-------------- | :--------------------------------- |
| **Nekt Express** | Google BigQuery | Via the Qlik BigQuery connector |
| **GCP** | Google BigQuery | Via the Qlik BigQuery connector |
| **AWS** | Amazon Athena | Via the Qlik Athena ODBC connector |
Nekt does not have a native connector for Qlik Sense. Registering an integration in the Nekt platform has no effect on the Qlik Sense connection — it only helps you stay organized about your existing dashboards. The connection is configured directly in Qlik Sense.
***
## Nekt Express
Nekt Express uses GCP infrastructure. Connect Qlik Sense using the native **Google BigQuery** connector.
You will need a Google account with access to the `nekt-hosted-infrastructure` BigQuery project. Refer to [Qlik's BigQuery connector documentation](https://help.qlik.com/en-US/connectors/Subsystems/ODBC_connector_help/Content/Connectors_ODBC/BigQuery/BigQuery-connector.htm) for full setup details.
1. In Qlik Sense, go to **Add new data** → **Data Connection**.
2. Search for and select **Google BigQuery**.
3. Authenticate with your Google account that has access to `nekt-hosted-infrastructure`.
4. Browse to your dataset (each layer is a dataset in BigQuery) and select tables.
***
## GCP
Your Nekt workspace is on your own GCP account. Connect Qlik Sense using the native **Google BigQuery** connector with your own project.
Refer to [Qlik's BigQuery connector documentation](https://help.qlik.com/en-US/connectors/Subsystems/ODBC_connector_help/Content/Connectors_ODBC/BigQuery/BigQuery-connector.htm) for full setup details.
1. In Qlik Sense, go to **Add new data** → **Data Connection**.
2. Select **Google BigQuery**.
3. Authenticate with your GCP credentials.
4. Select your project, datasets, and tables.
***
## AWS
Your Nekt workspace is on your own AWS account. Connect Qlik Sense using the **Amazon Athena** ODBC connector.
> You will need AWS credentials — Access Key ID and Secret Access Key. Generate them using [this AWS guide](https://docs.aws.amazon.com/IAM/latest/UserGuide/access-key-self-managed.html#Using_CreateAccessKey).
### Step 1: Find the Athena connector
1. In the Qlik Sense main page, go to **Add new data** → **Data Connection**.
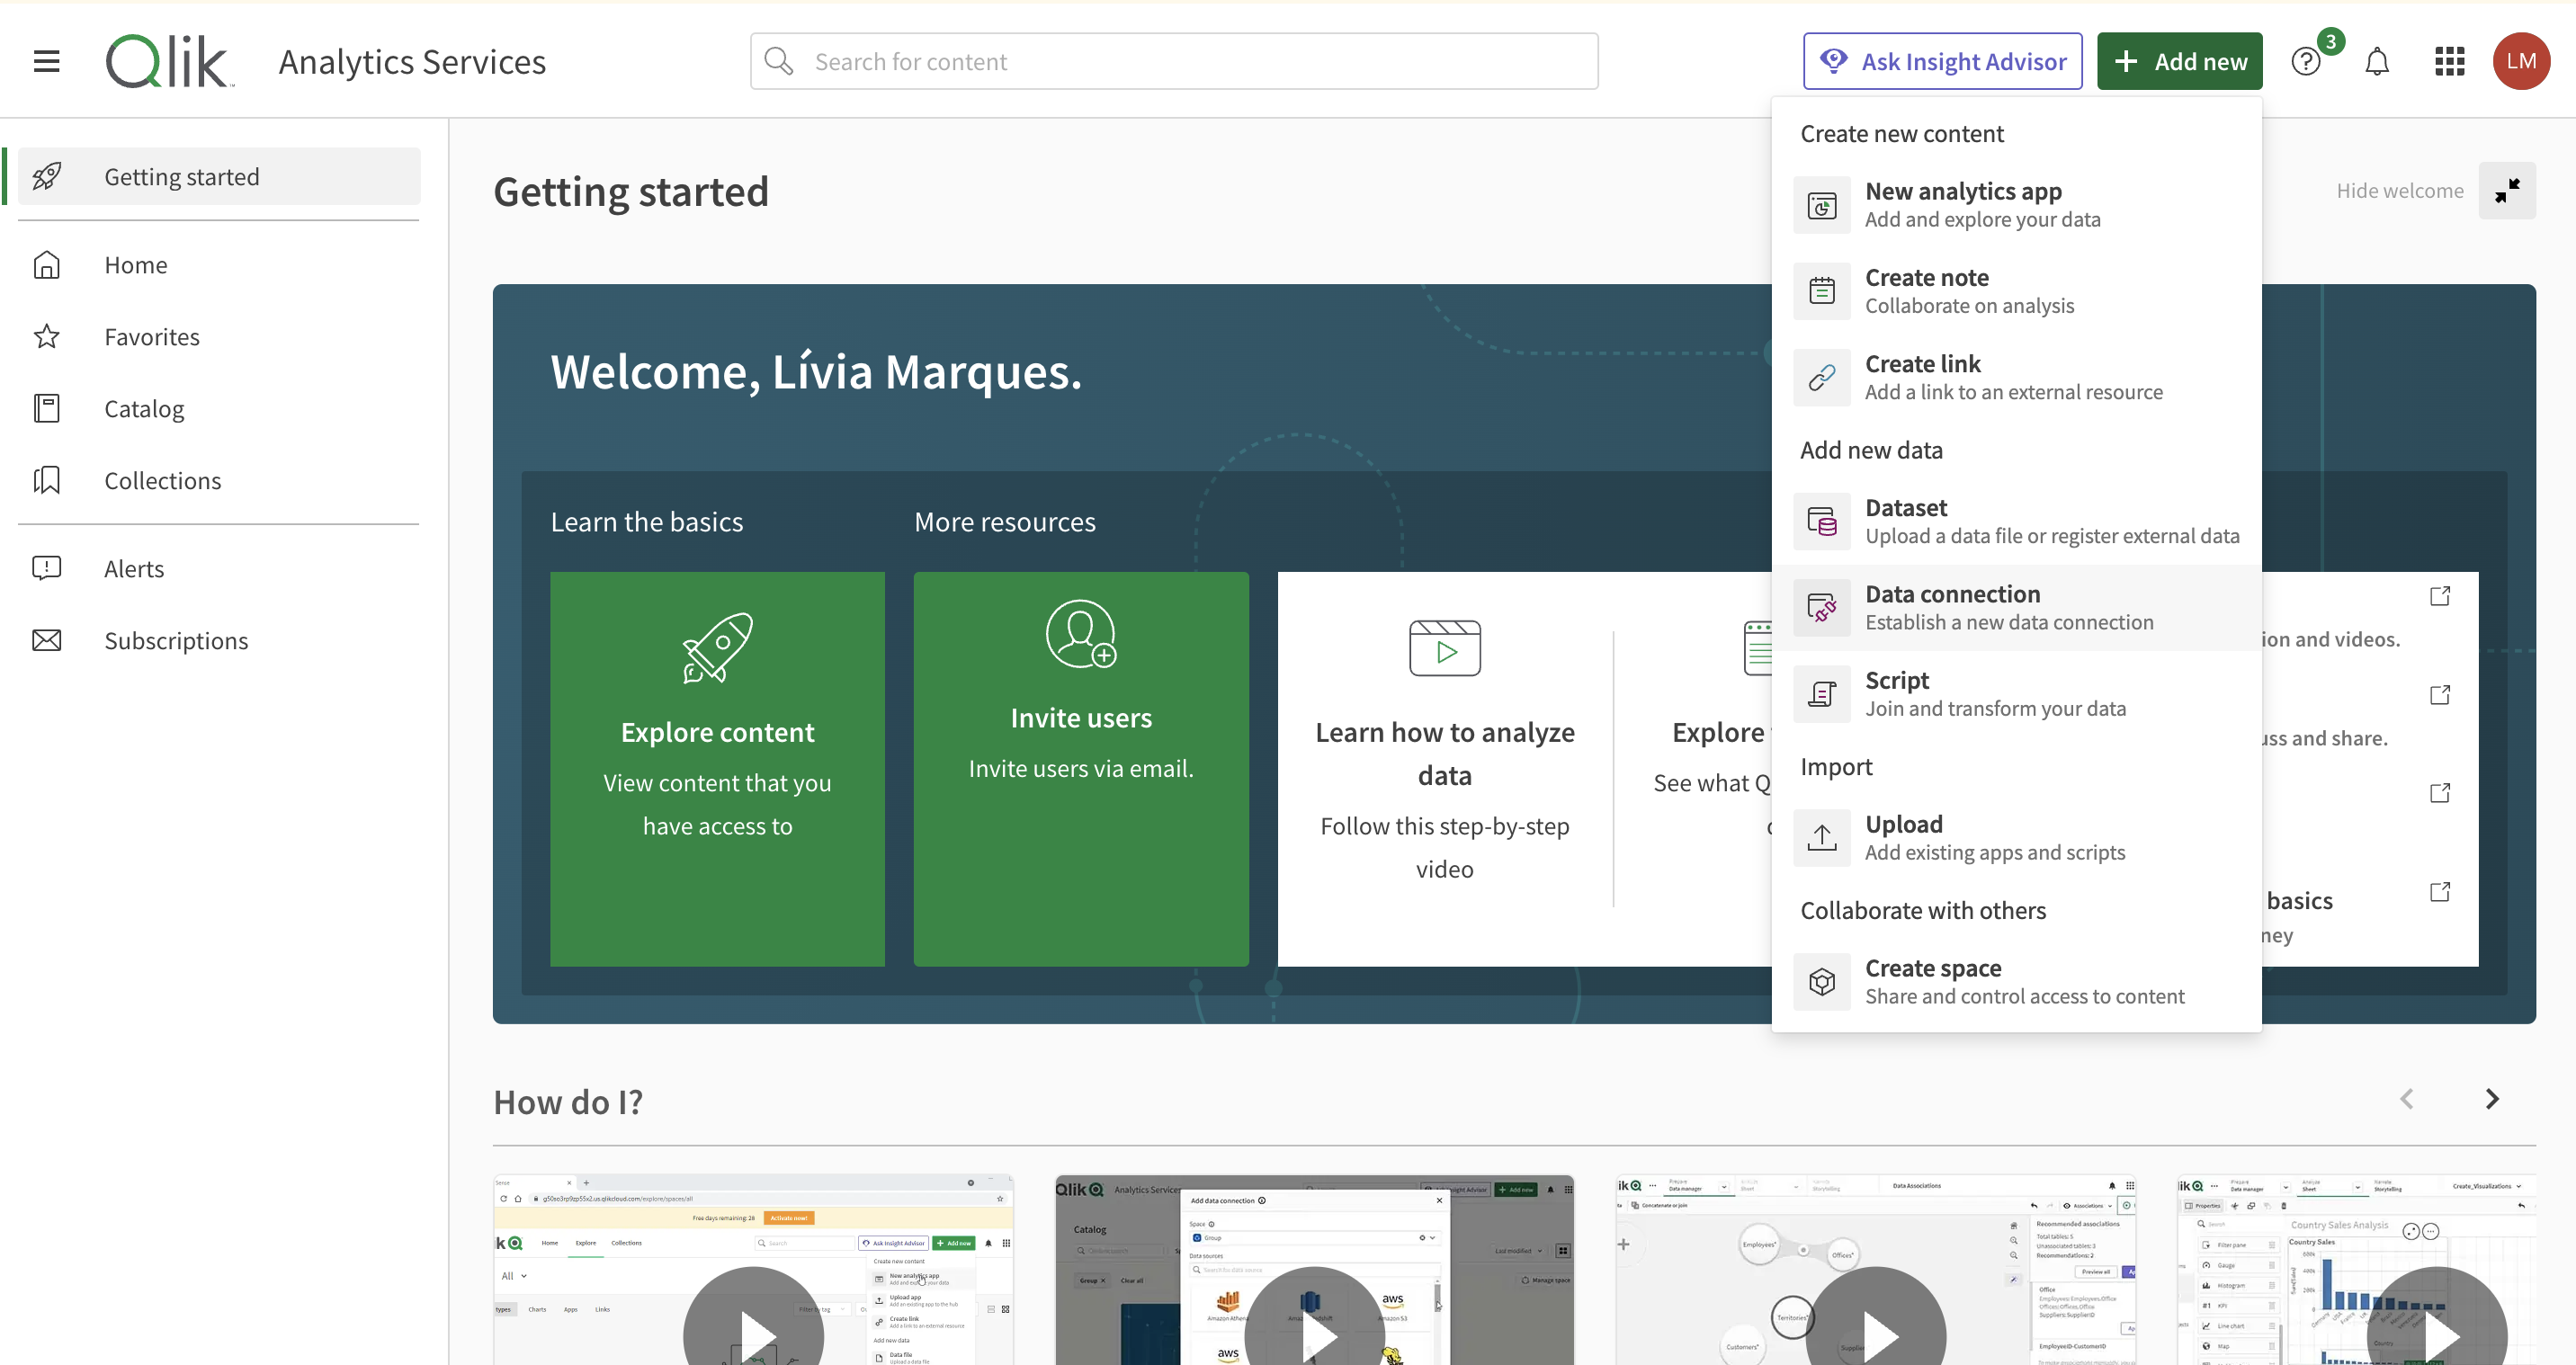 2. Select **Amazon Athena**.
There is a second Athena option labeled "via Direct Access Gateway" — do not use it. This guide requires the standard **Amazon Athena** connector.
2. Select **Amazon Athena**.
There is a second Athena option labeled "via Direct Access Gateway" — do not use it. This guide requires the standard **Amazon Athena** connector.
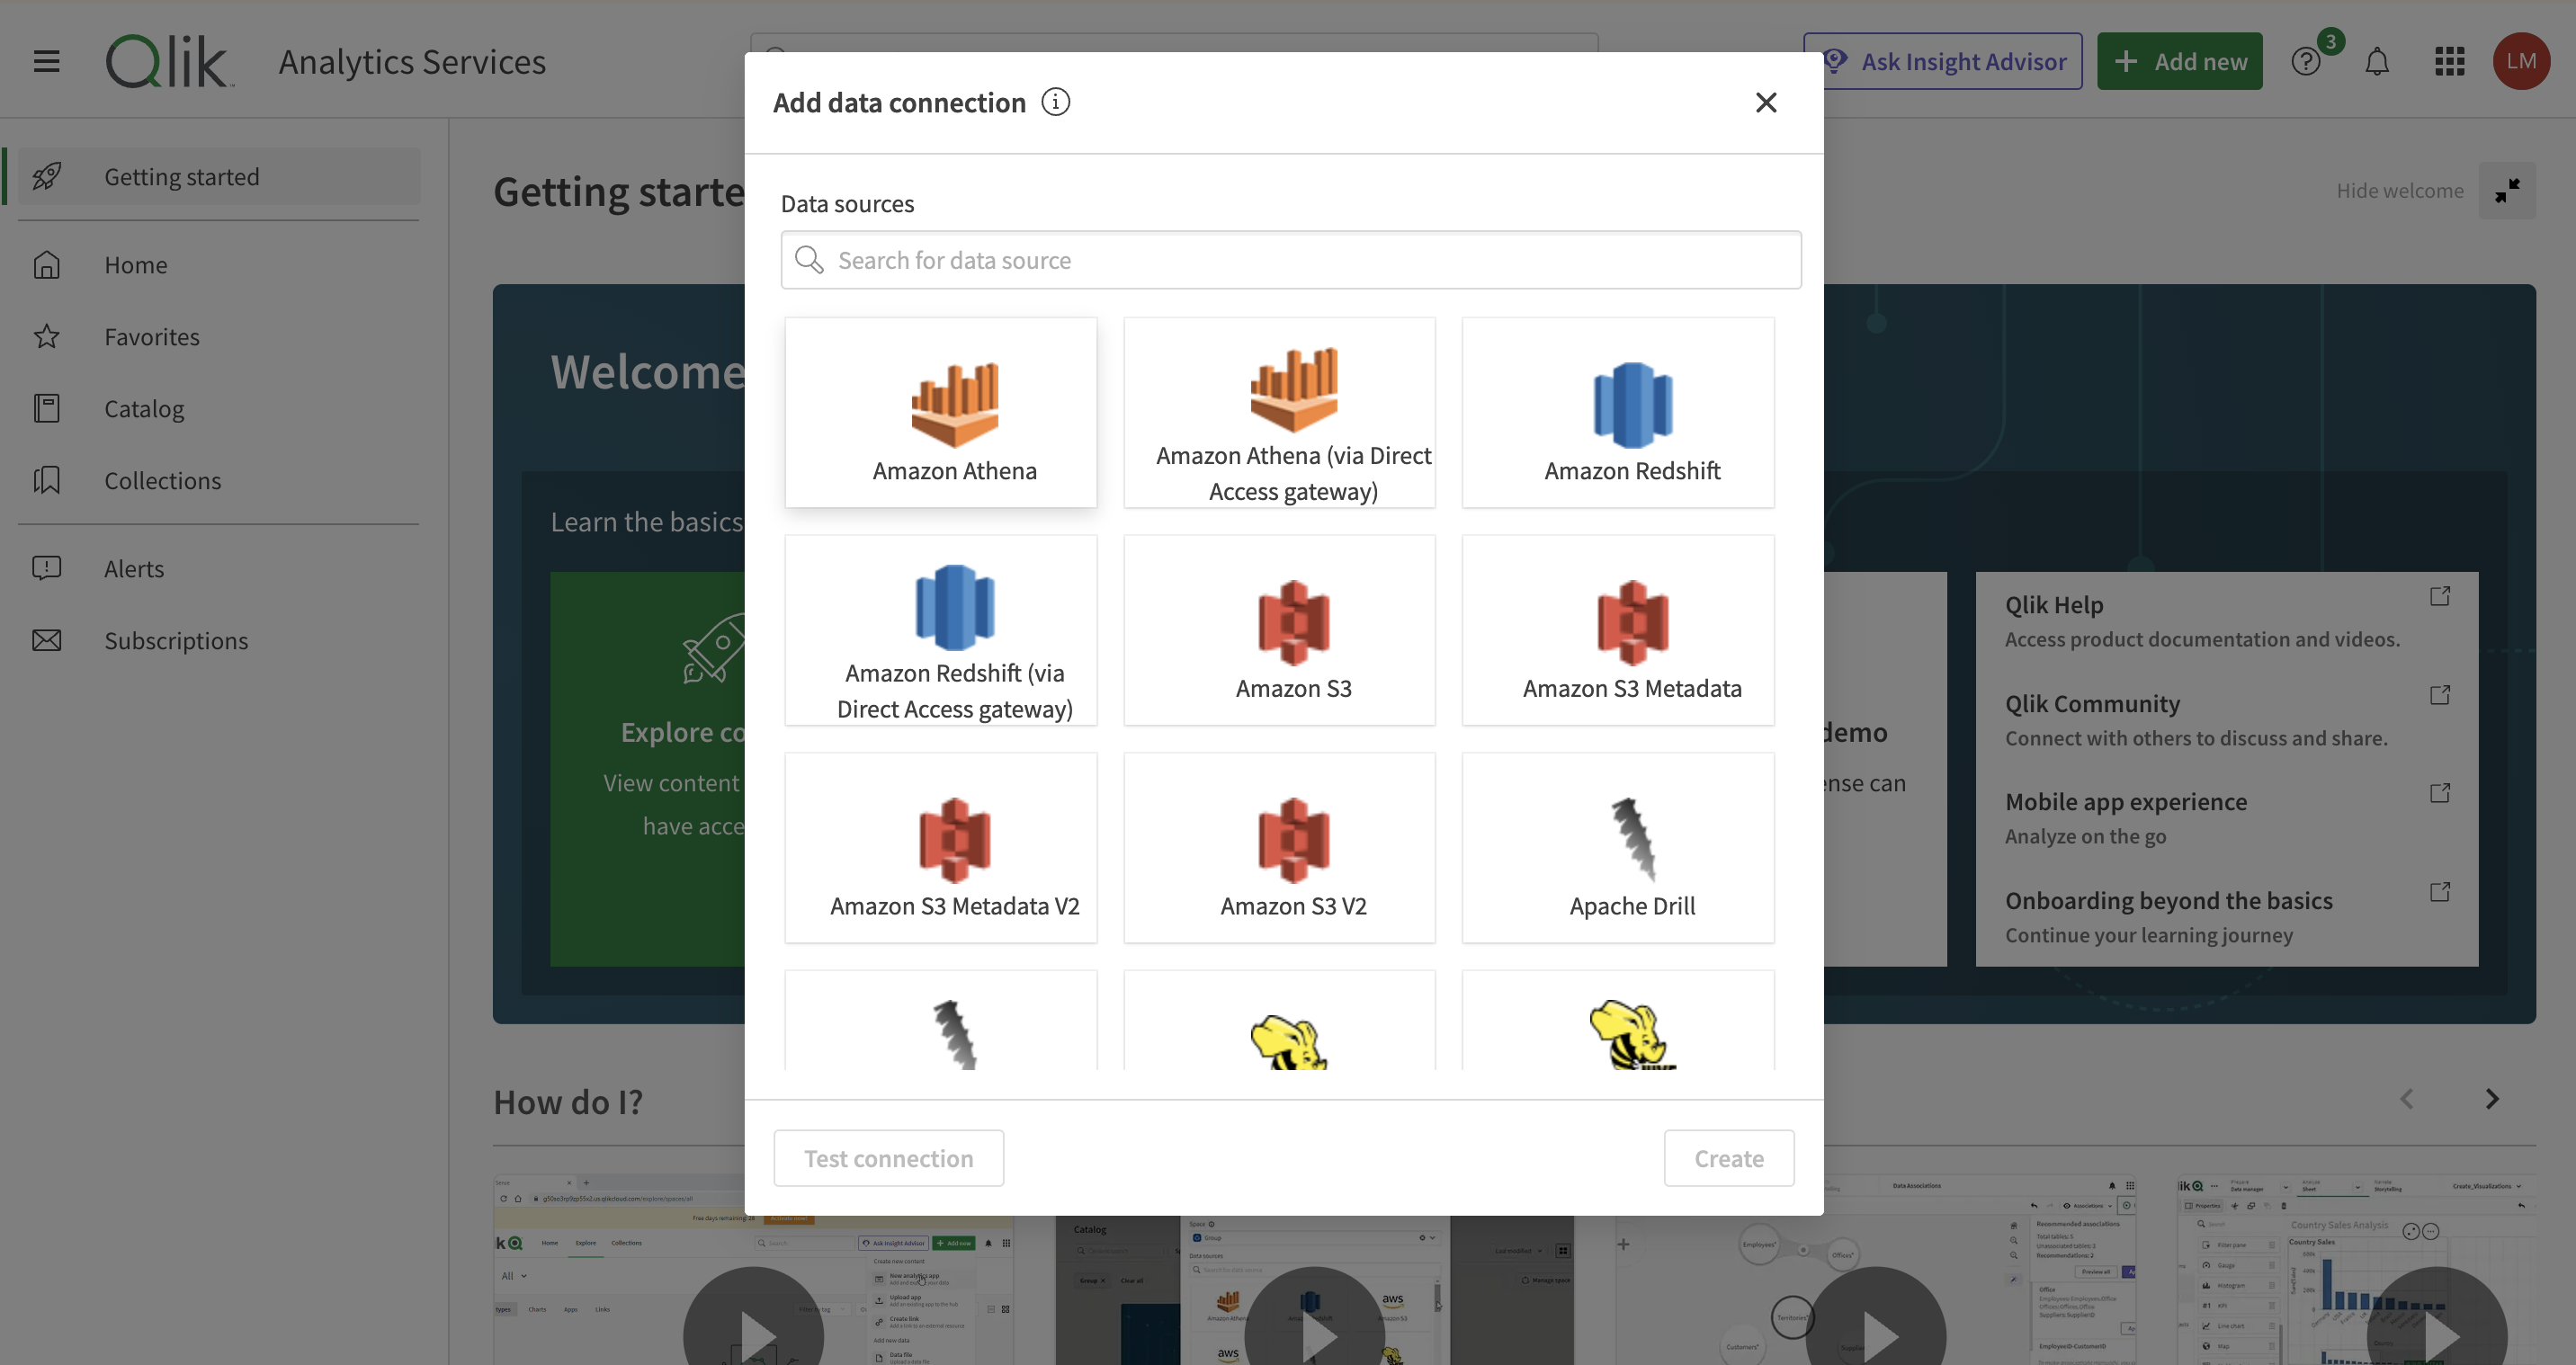 ### Step 2: Enter connection credentials
Update the following fields (you can leave others as default):
* **AWS Region**: your workspace region
* **Data source**: `AwsDataCatalog`
* **Database**: the layer to connect
* **Workgroup**: `primary`
* **Access key ID**: your IAM Access Key ID
* **Secret Key**: your IAM Secret Access Key
* **S3 output location**: `s3://nekt-lakehouse-{your_company_slug}/_athena`
Contact Nekt support for your company slug and region.
Click **Test Connection** to verify.
### Step 2: Enter connection credentials
Update the following fields (you can leave others as default):
* **AWS Region**: your workspace region
* **Data source**: `AwsDataCatalog`
* **Database**: the layer to connect
* **Workgroup**: `primary`
* **Access key ID**: your IAM Access Key ID
* **Secret Key**: your IAM Secret Access Key
* **S3 output location**: `s3://nekt-lakehouse-{your_company_slug}/_athena`
Contact Nekt support for your company slug and region.
Click **Test Connection** to verify.
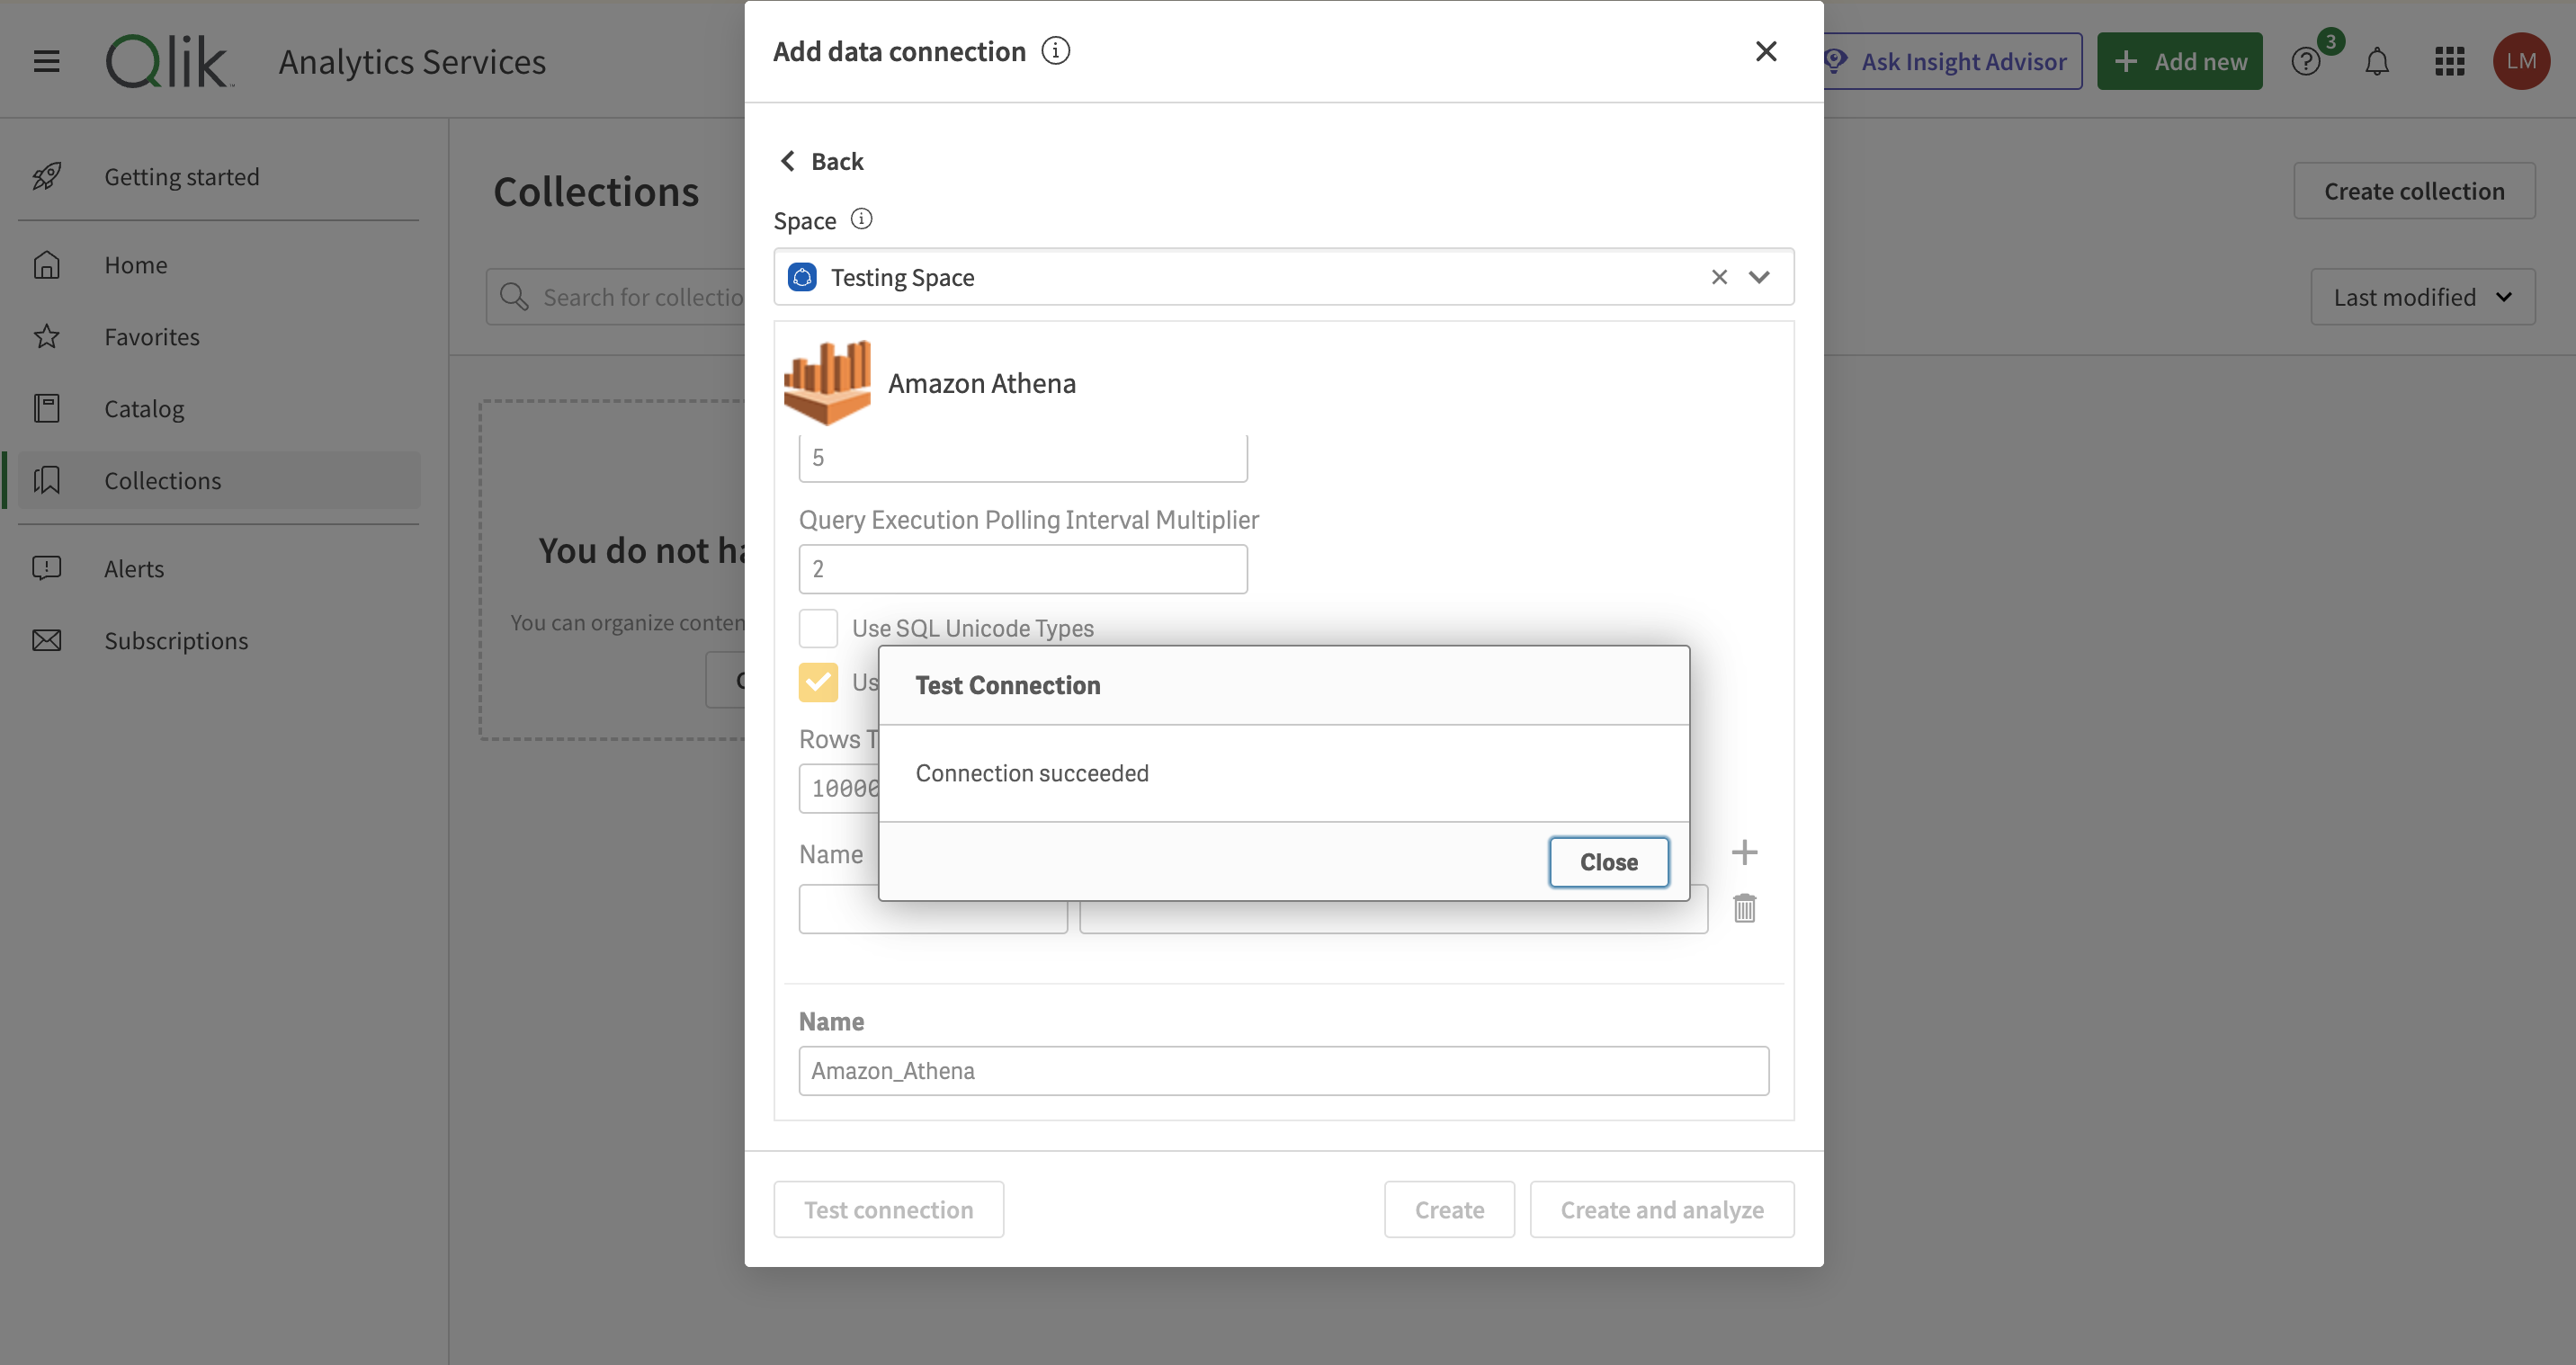 ### Step 3: Connect and select data
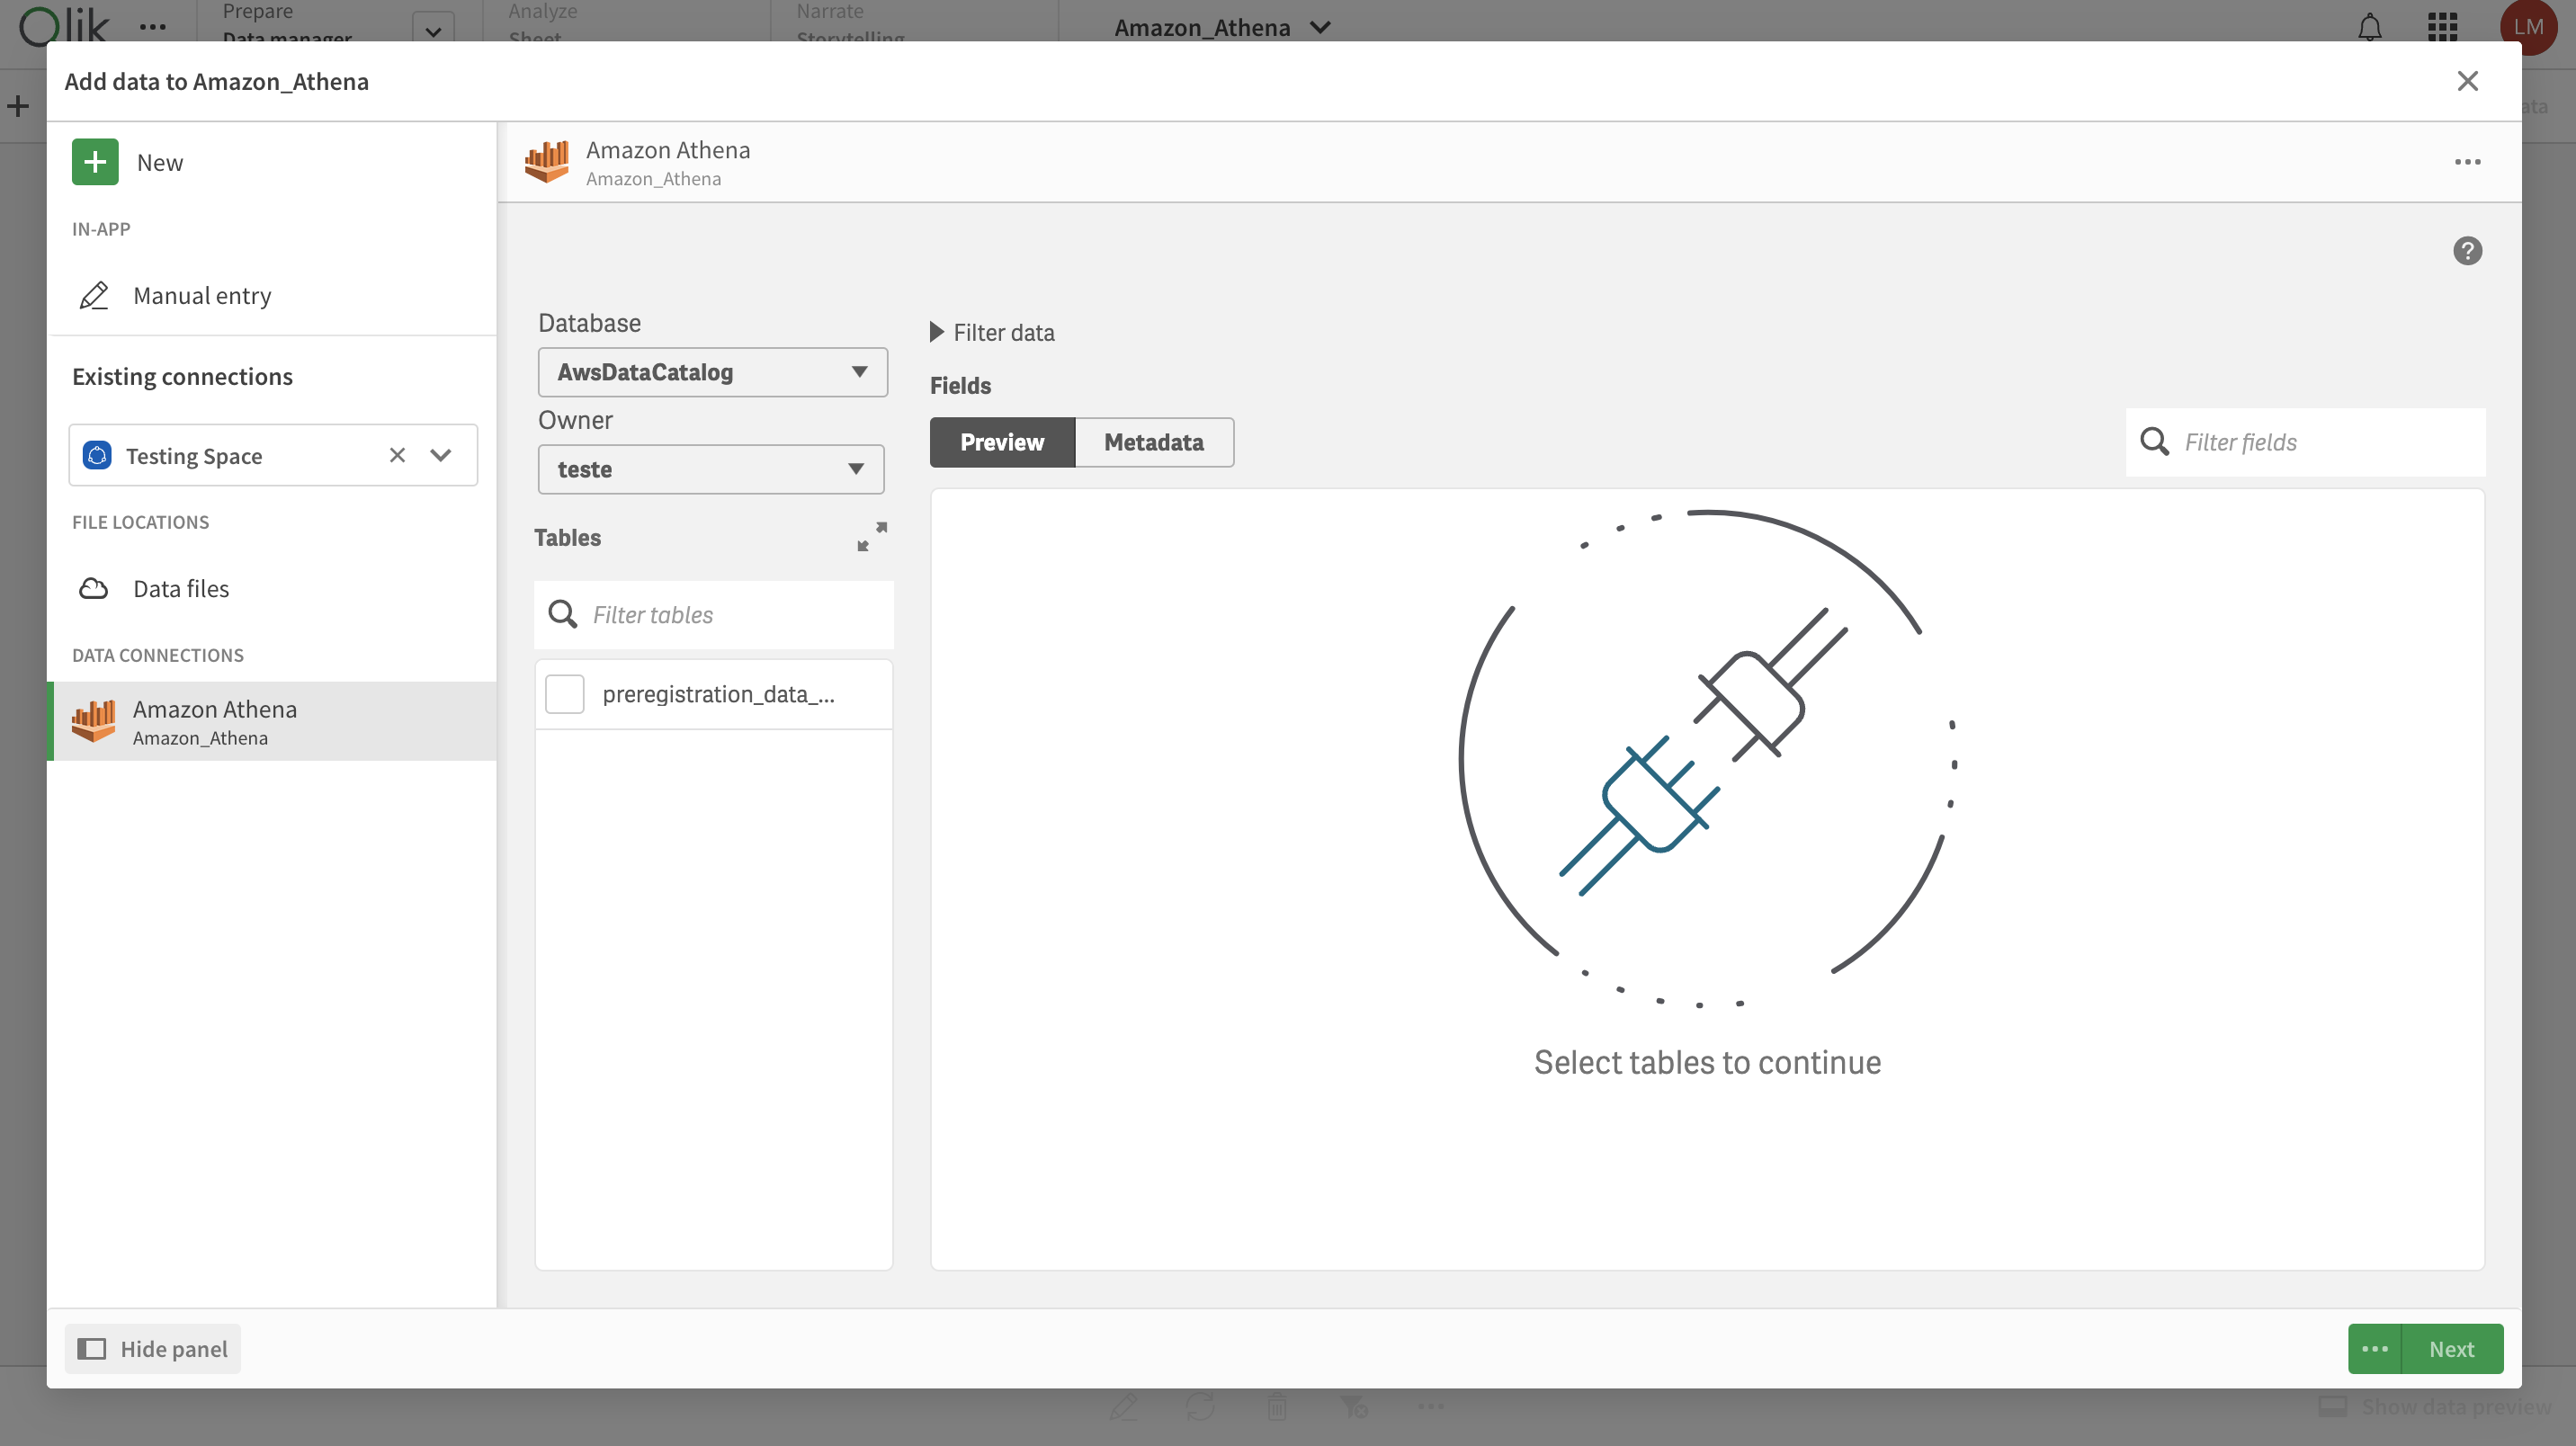
Click **Connect and Analyze**. Use the checkboxes to select the tables and columns you need, then click **Next** to start building dashboards.
### Step 3: Connect and select data
Click **Connect and Analyze**. Use the checkboxes to select the tables and columns you need, then click **Next** to start building dashboards.
 > For more details, see the [Qlik Sense Amazon Athena connector documentation](https://help.qlik.com/en-US/connectors/Subsystems/ODBC_connector_help/Content/Connectors_ODBC/Athena/Athena-connector.htm).