

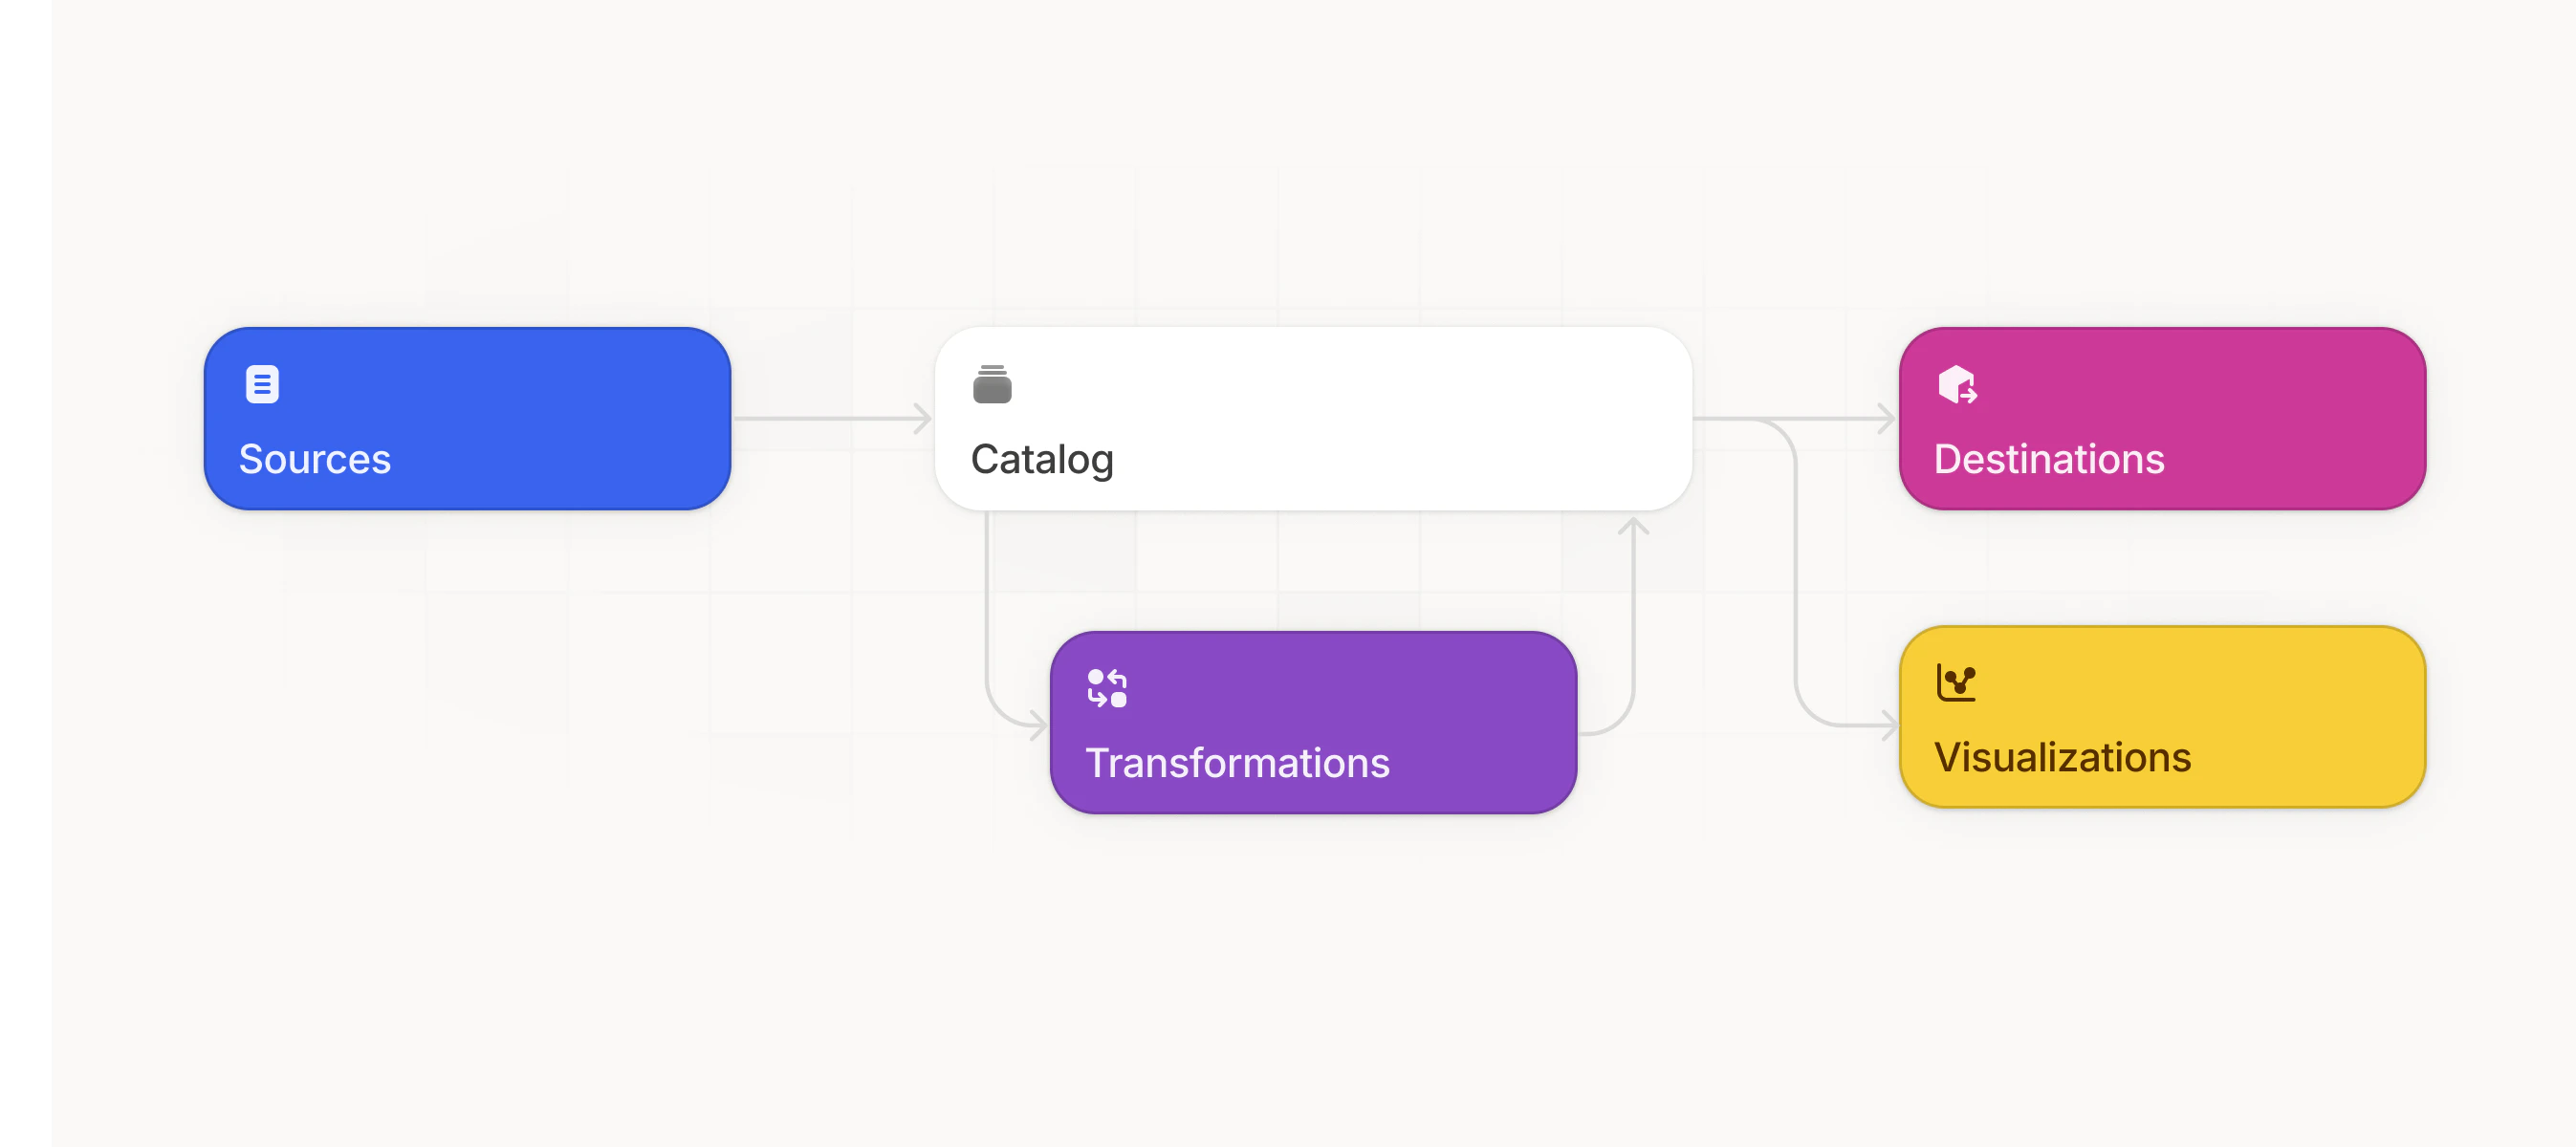
How data flows through the Catalog
- Sources write tables to the Catalog as data is extracted.
- Queries and Notebooks read tables from it and write their outputs back.
- History tracks changes to tables over time.
- Destinations and Integrations consume tables from it to deliver value.
The hierarchy
Data in the Catalog is organized into a simple hierarchy. Each building block has its own page:Layers
The top-level storage and permission boundary, such as Bronze, Silver, and Gold.
Folders
Organization inside a Layer, grouping tables by source, domain, or project.
Tables
The datasets created by Sources, Queries, Notebooks, and History.
Organize your Catalog
A clear structure makes data easier to find, protects access boundaries, and gives people and AI agents better context. Define the first version before connecting production sources, then evolve it as real use cases appear. For how to pick a Layer model (by processing stage, by client, or both) and how to name tables so people and agents understand them, see Layers and Tables.Start with the minimum structure
1
Identify data ownership
Decide whether the workspace will contain internal data, client data, or both.
2
Define access boundaries
List which teams or clients must be isolated. Use those boundaries to choose the Layer model.
3
Create the first Layers
Create only the Layers required for the first use case. You can add more as the operation grows.
4
Map the first source
Select only the streams required for the first use case and give their output tables descriptive names.
5
Review after real usage
Revisit the structure after the team has used the data. Recurring questions reveal which Silver or Gold tables should be created next.
Avoid common mistakes
- Creating a Layer for every Source when there is no access or lifecycle reason for it.
- Mixing source tables and business-ready tables without a naming or Layer convention.
- Connecting every available stream before defining the first use case.
- Creating deep Folder hierarchies that make tables harder to find.
- Renaming Layers and tables without checking dependent pipelines and context documents.
Related documentation
Connect a data source
Map the first source streams to tables in your Catalog.
Permissions
Control which Members can access each Layer and table.
Lineage
Understand how tables and pipelines depend on each other.
Volumes
Store files beyond tables, such as PDFs, images, and videos.