According to Microsoft’s website, “The on-premises data gateway acts as a bridge, providing quick and secure data transfer between on-premises data (data that isn’t in the cloud) and several Microsoft cloud services. These cloud services include Power BI, Power Apps, Power Automate, Azure Analysis Services, and Azure Logic Apps. Using a gateway, organizations can keep databases and other data sources in their on-premises networks while securely using that on-premises data in cloud services.”If you want to use an AWS machine as a gateway, learn how to configure it in this documentation. The initial configuration steps, indicated in item 1, are similar to local connector usage.
1. On the machine running the gateway
Access the machine running the gateway and:- Update Power BI, which must be installed, to the latest version;
- Update the On-Premises Data Gateway, which must also be installed, to the latest version;
- Download and install the Amazon Athena ODBC 2.x driver;
- Download the Nekt connector (nekt.mez) and save it in the
[Documents]\Power BI Desktop\Custom Connectorsfolder (or similar, you need to check which folder your Power BI version is using on the gateway); - Open Power BI on this machine and in the Data Extensions settings, ensure that external connectors are allowed;
2. Configuring the On-Premises Data Gateway
Ensure that the On-premises Data Gateway is installed - just follow the installation steps that follow after downloading and opening the program. In the ‘Email address to use with this gateway’ field, use the email used in Power BI Service. Use your Power BI Service access to log in. Then, to register the Gateway, select the option ‘Register a new gateway on this computer’.- give a name to the new gateway (suggestion ‘aws-gateway’)
- define a recovery key to recover the gateway if needed
- click ‘Configure’ After these steps, you should receive a message that the gateway is online and ready to use.
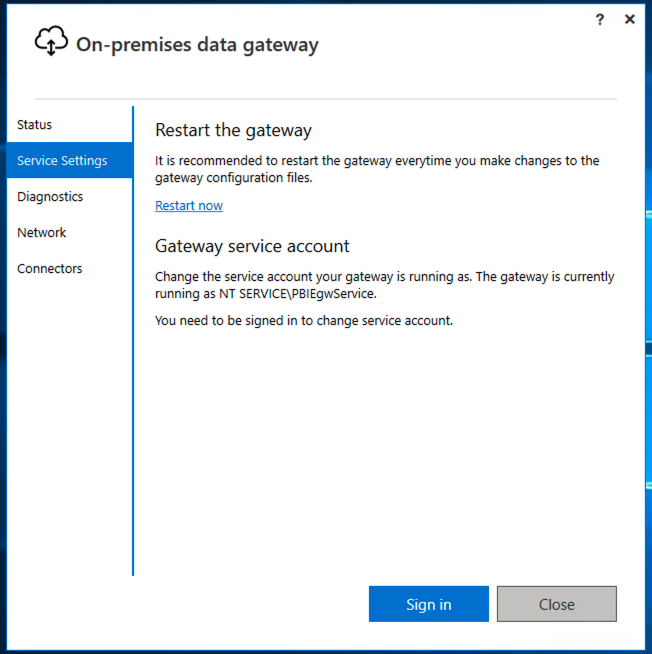
NT SERVICE\PBIEgwService.
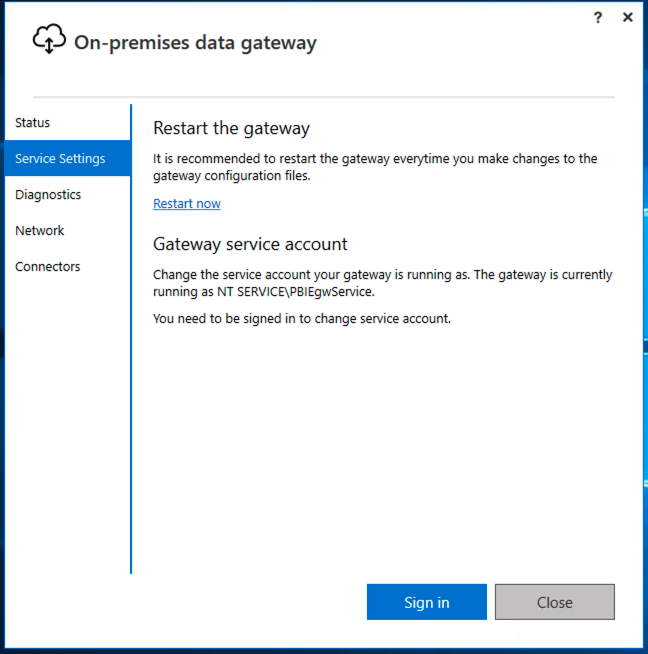
To confirm which user you’re using, simply open the On-Premises Data Gateway and navigate to the Service Settings menu.
In the example below, the user is explicitly shown at the end, stating:
The gateway is currently running as NT SERVICE\PBIEgwService.
- Open the local folder where custom connectors (Custom Connectors) used by the gateway are saved;
- Right-click and click
Properties; - Go to the
Securitytab (in the example below, you’ll notice that in theGroup or user namessection, the userPBIEgwServicealready exists, but in your gateway, this user probably won’t be in this list), and clickEdit; - A new window will open called
Permissions for Custom Connectors. In this window, clickAddto add a new user; - In the
Enter the object names to selectsection, typeNT SERVICE\PBIEgwService(or your gateway username) and clickCheck Names. If the user is valid, it will be replaced only by the second part of the userPBIEgwServiceand will be underlined, indicating that Windows located this user. ClickOK; - You’ll return to the previous screen, where you can assign the rights this user has in this folder. Grant the rights of
Read & execute,List folder contents,Read, clickApplyand thenOKto finish the process;
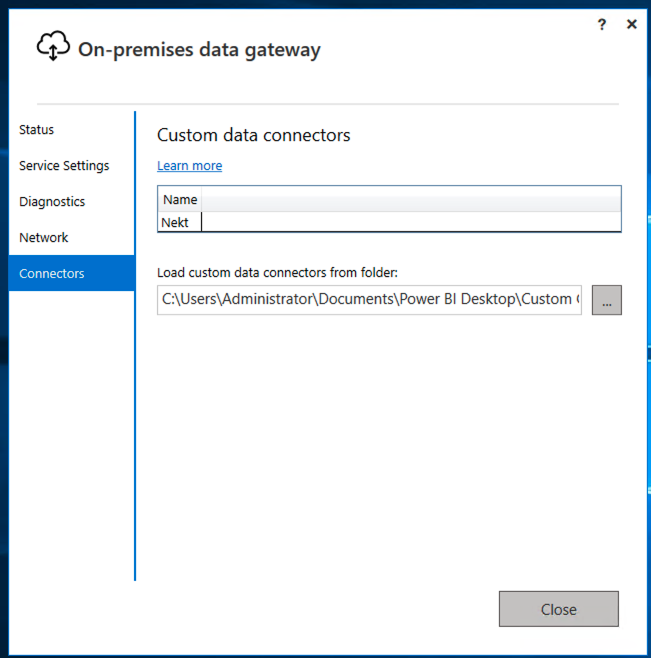
Once these permissions are granted, you should return to the On-Premises Data Gateway app, this time in the
Connectors menu, and indicate the folder where your custom connectors are located. When you click Apply, the gateway will restart.
In the example below, the Nekt connector is already listed at the top, but it’s possible that your gateway won’t appear at this stage.
If this is the case, please open the Service Settings menu and restart the gateway. Return to the Connectors menu and contact us if the Nekt connector doesn’t appear in the list.
Then, follow the platform instructions to complete the process.
3. Publishing a Semantic Model
After using the Nekt connector in Power BI and creating the desired semantic model, you can publish it normally while logged in with your Power BI Service account. Now, to create an automatic refresh from the gateway, you need to configure the On-Premise Data Gateway in Power BI Service.4. Configuring the On-Premise Data Gateway in Power BI Service
In Power BI service, access the Settings menu and Manage connections and gateways. The gateway created earlier should be listed in the On-premises data gateways tab. Access the settings of the created gateway and set the following configurations:- In the General section, check the option “Distribute requests across all active gateways in this cluster”
- In the Power BI section, select the options “Allow user’s cloud data sources to refresh through this gateway cluster” and “Allow user’s custom data connectors to refresh through this gateway cluster” Click Save.
5. Configuring the Semantic Model for Gateway Usage
Access the settings of the previously created Semantic Model. In the Gateway and cloud connections section, the created gateway will initially be disabled, with status “Not properly configured”. To fix this, click the play icon and, in the box that opens, click “Add manually to gateway”. For each semantic model created in Power BI, this process (steps 5 and 6) must be repeated. To add manually to the gateway, specify:- Connection name: for better understanding, we suggest using the same Visualization Identifier (power-bi-xxxx) here
- Visualization identifier: use the Visualization Identifier (power-bi-xxxx)
- Authentication method: Visualization Token
- Visualization token: select the token associated with the Visualization Identifier in Nekt