1. Introduction
The Slack destination allows you to send your data directly into a Slack channel of your choice. It allows for automated workflows to share data with your team in a flexible and efficient way. We allow you to customize a message using Slack’s markup language, and sending the input data attached as a CSV file or an image. The result would look like this: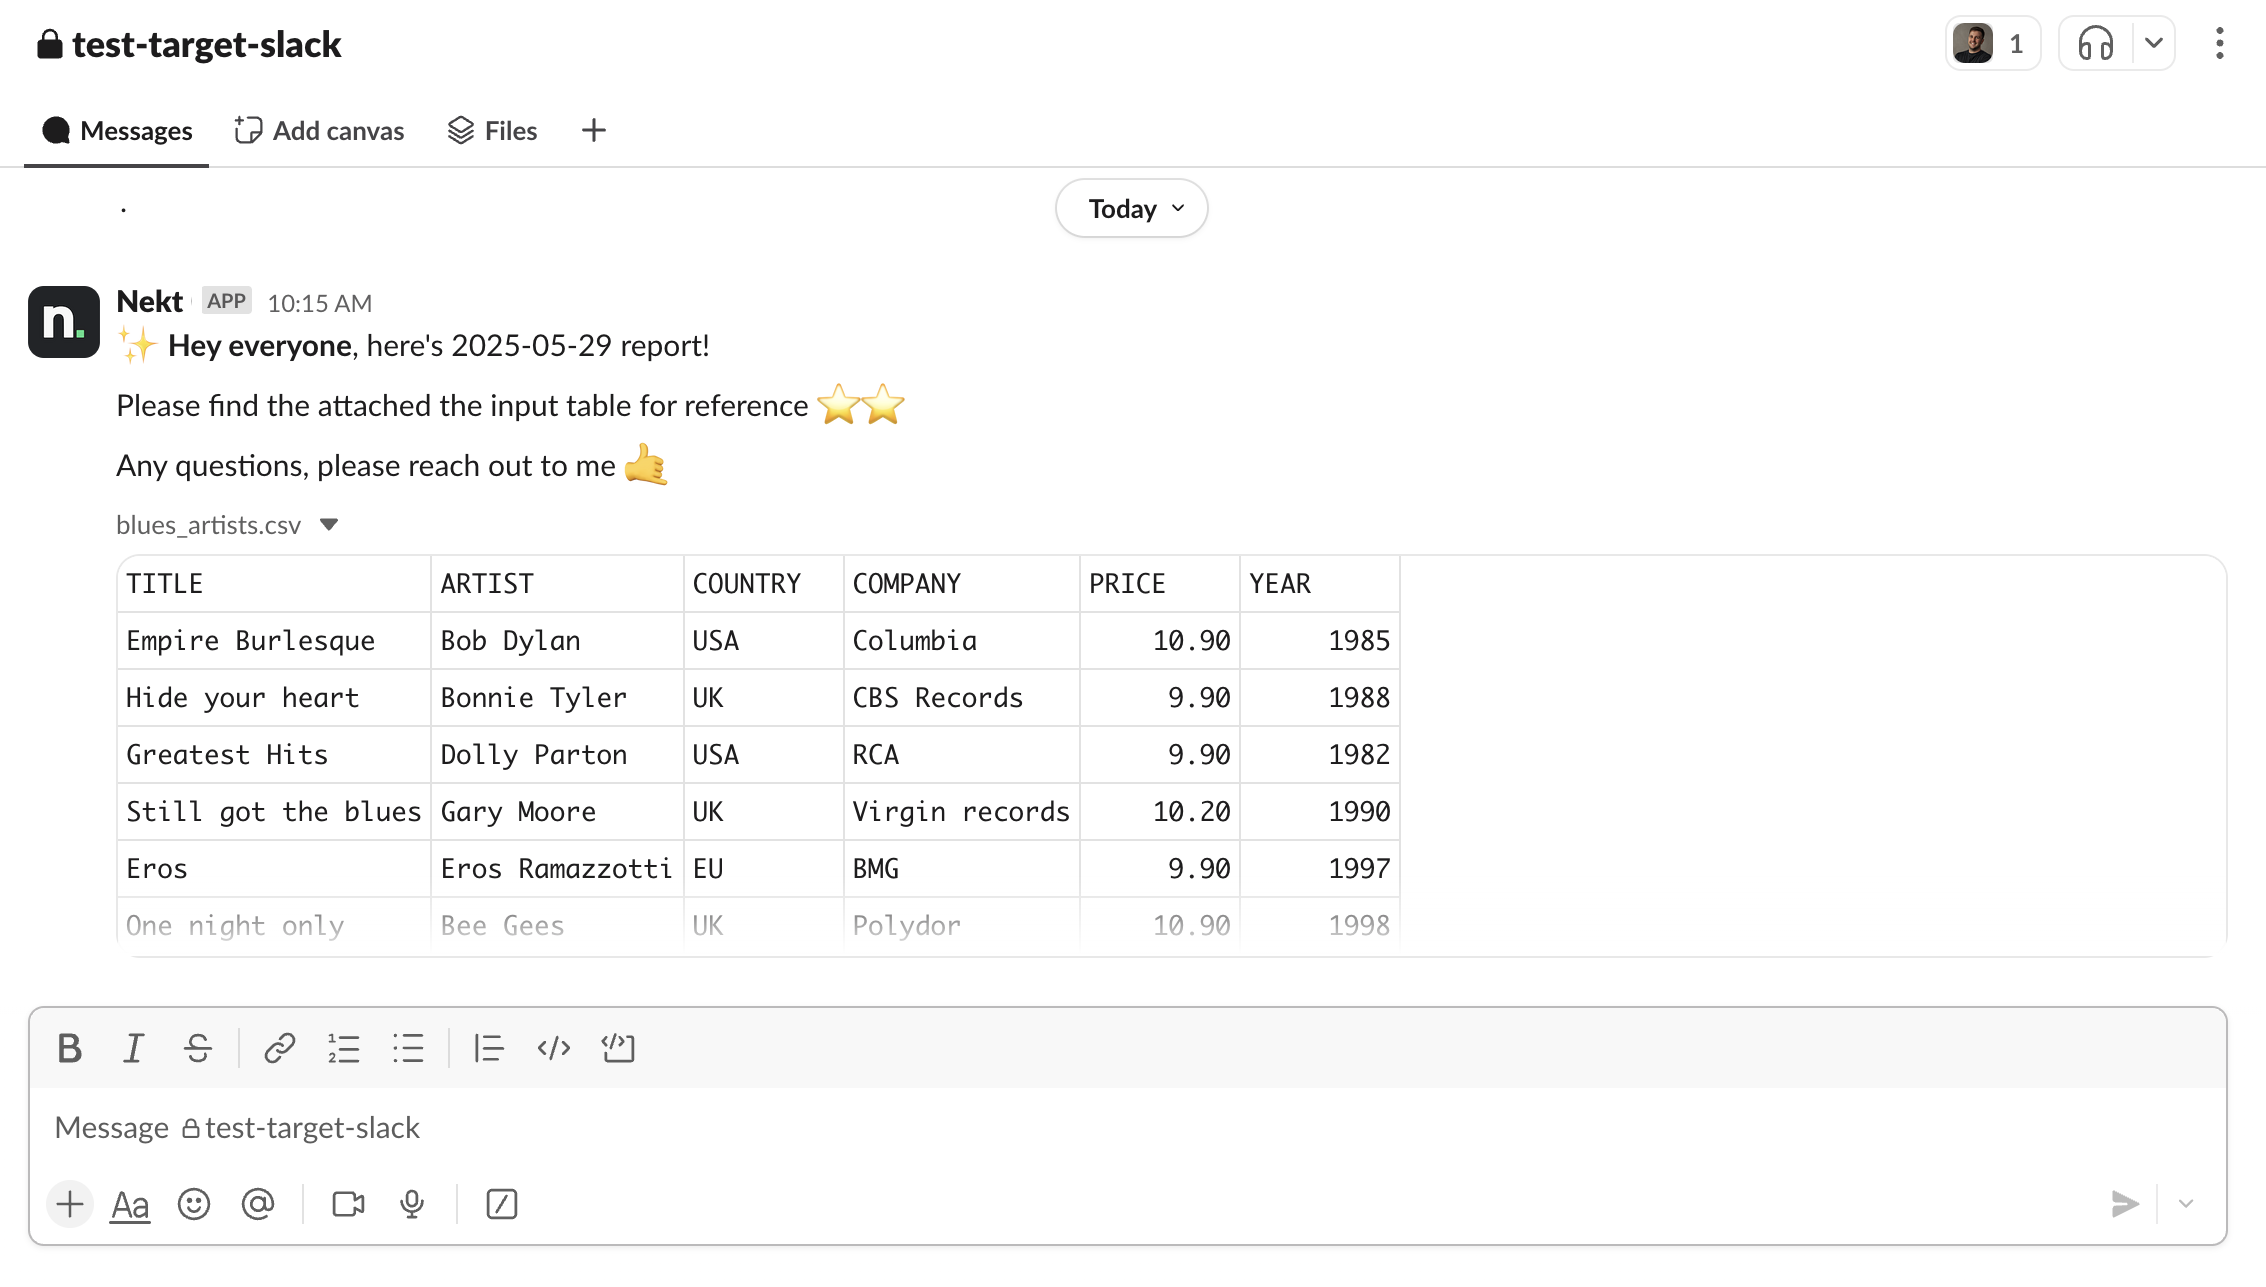
- You should install the Nekt bot and grant permission for accessing and sending messages to your channels.
- You should add the Nekt bot to the channel you want to send messages to.
2. Configure the Slack destination
- In the Destinations tab, click on the “Add destination” button located on the top right of your screen. Then, select the Slack option from the list of connectors.
-
Click Next and you’ll be prompted to add the connector configuration.
-
Authorization: first of all, authorize Nekt through the Slack Authorization button. You must be an App Manager to authorize the installation of our app into your workspace.
You’ll see the following warning when installing the app:
This app is not approved by Slack. Apps are reviewed to ensure a quality experience.This occurs because our app is private and not yet available in the Slack marketplace. -
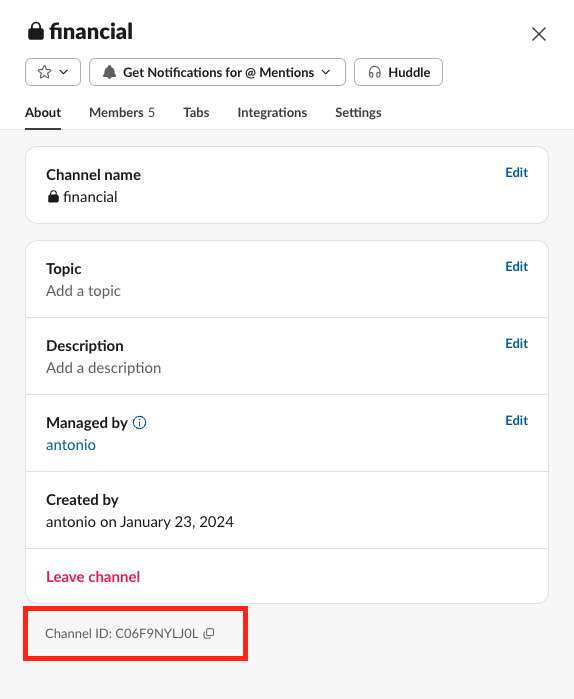
Channel ID: the Slack channel ID to send messages to.
The channel ID can be found by right-clicking the channel name and selecting ‘View details’. The channel ID will be available at the bottom of the modal.
Note that the Slack app must be a member of the channel to be able to send messages. This is how to do it:
- Type the command
/addin the message input box of the channel you want to add the bot. - Choose
Add apps to your channel. - Select the
Nekt Destinationapp. - You’re all set!
- Type the command
-
Message body: The message to send along with the attached file. You can use Slack markup language to customize and style your message using emojis, different font styles, breaking lines, and so on. Please check the official Slack documentation for more information. Use
{datestamp}to inject the current date (format configurable via the Date format field). -
Date format (optional): The format to use when rendering the
{datestamp}variable in the message body. Uses Python strftime syntax (e.g.%Y-%m-%d→ 2026-03-12,%d/%m/%Y→ 12/03/2026). Defaults to%Y-%m-%d. Use{datestamp}anywhere in the message to inject the current date. The format defaults toYYYY-MM-DD(e.g.2026-03-12) and can be changed with the Date format field described below. -
Date format (optional): Controls the format of the
{datestamp}variable in the message body. Defaults to%Y-%m-%d. Uses Pythonstrftimesyntax — for the full list of format codes, see the Python documentation. Common examples:Format string Result %Y-%m-%d2026-03-12 %d/%m/%Y12/03/2026 %B %d, %YMarch 12, 2026 %m-%d-%Y03-12-2026 This field is located under Advanced Settings in the destination configuration. -
Single record mode (optional): Whether to send a single record message body. If enabled, it will only accept tables composed of a single record, where the columns from the input table can be referenced in the message using
{field_name}.
Example
Assuming you have a sales KPIs table like this:Your message body looks like this:total_revenue total_orders average_order_value conversion_rate 12500 250 50 3.2 The resulting Slack message will be:This will dynamically replace the field references with actual values from your table. -
Authorization: first of all, authorize Nekt through the Slack Authorization button. You must be an App Manager to authorize the installation of our app into your workspace.
- Click Next.
3. Select your data to send
-
The next step is letting us know which data you want to send on the Slack message. Select the layer and then the desired table.
The maximum allowed file size is 1GB for Slack. In case of large datasets, please limit the number of records from your input table to avoid hitting this constraint.
- Click Next.
4. Define the trigger
- Describe your destination for easy identification within your organization. You can inform things like what data it sends, to which team it belongs, etc.
- To define your Trigger, consider how often you want this email to be sent to the list of recipients. This decision usually depends on how frequently you need the new table data updated (every day, once a week, only at specific times, etc.).
- Click Done.
Check your new destination!
- Once completed, you’ll receive confirmation that your new destination is set up!
- You can view your new destination on the Destinations page. Now, for the email to be actually sent, you have to wait for the pipeline to run. You can monitor it on the Destinations page to see its execution and completion. If needed, manually trigger the pipeline by clicking on the refresh icon. Once executed, your email should be sent.
If you encounter any issues, reach out to us via Slack, and we’ll gladly assist you!