


1. How it works
You already have the outcome in Nekt: a table of paid orders, won deals, or qualified leads. This destination turns each row into an event and posts it to your Pixel or Dataset in Meta Events Manager.user_data object, Nekt hashes the sensitive ones with SHA-256, and Meta matches those hashes against its own users. The more identifiers you send per row, the higher your match rate.
2. Before you start
1
Find your Pixel ID or Dataset ID
Open Meta Events Manager and go to the Data sources tab. The ID is shown under the name of the data source. See Meta’s article for details.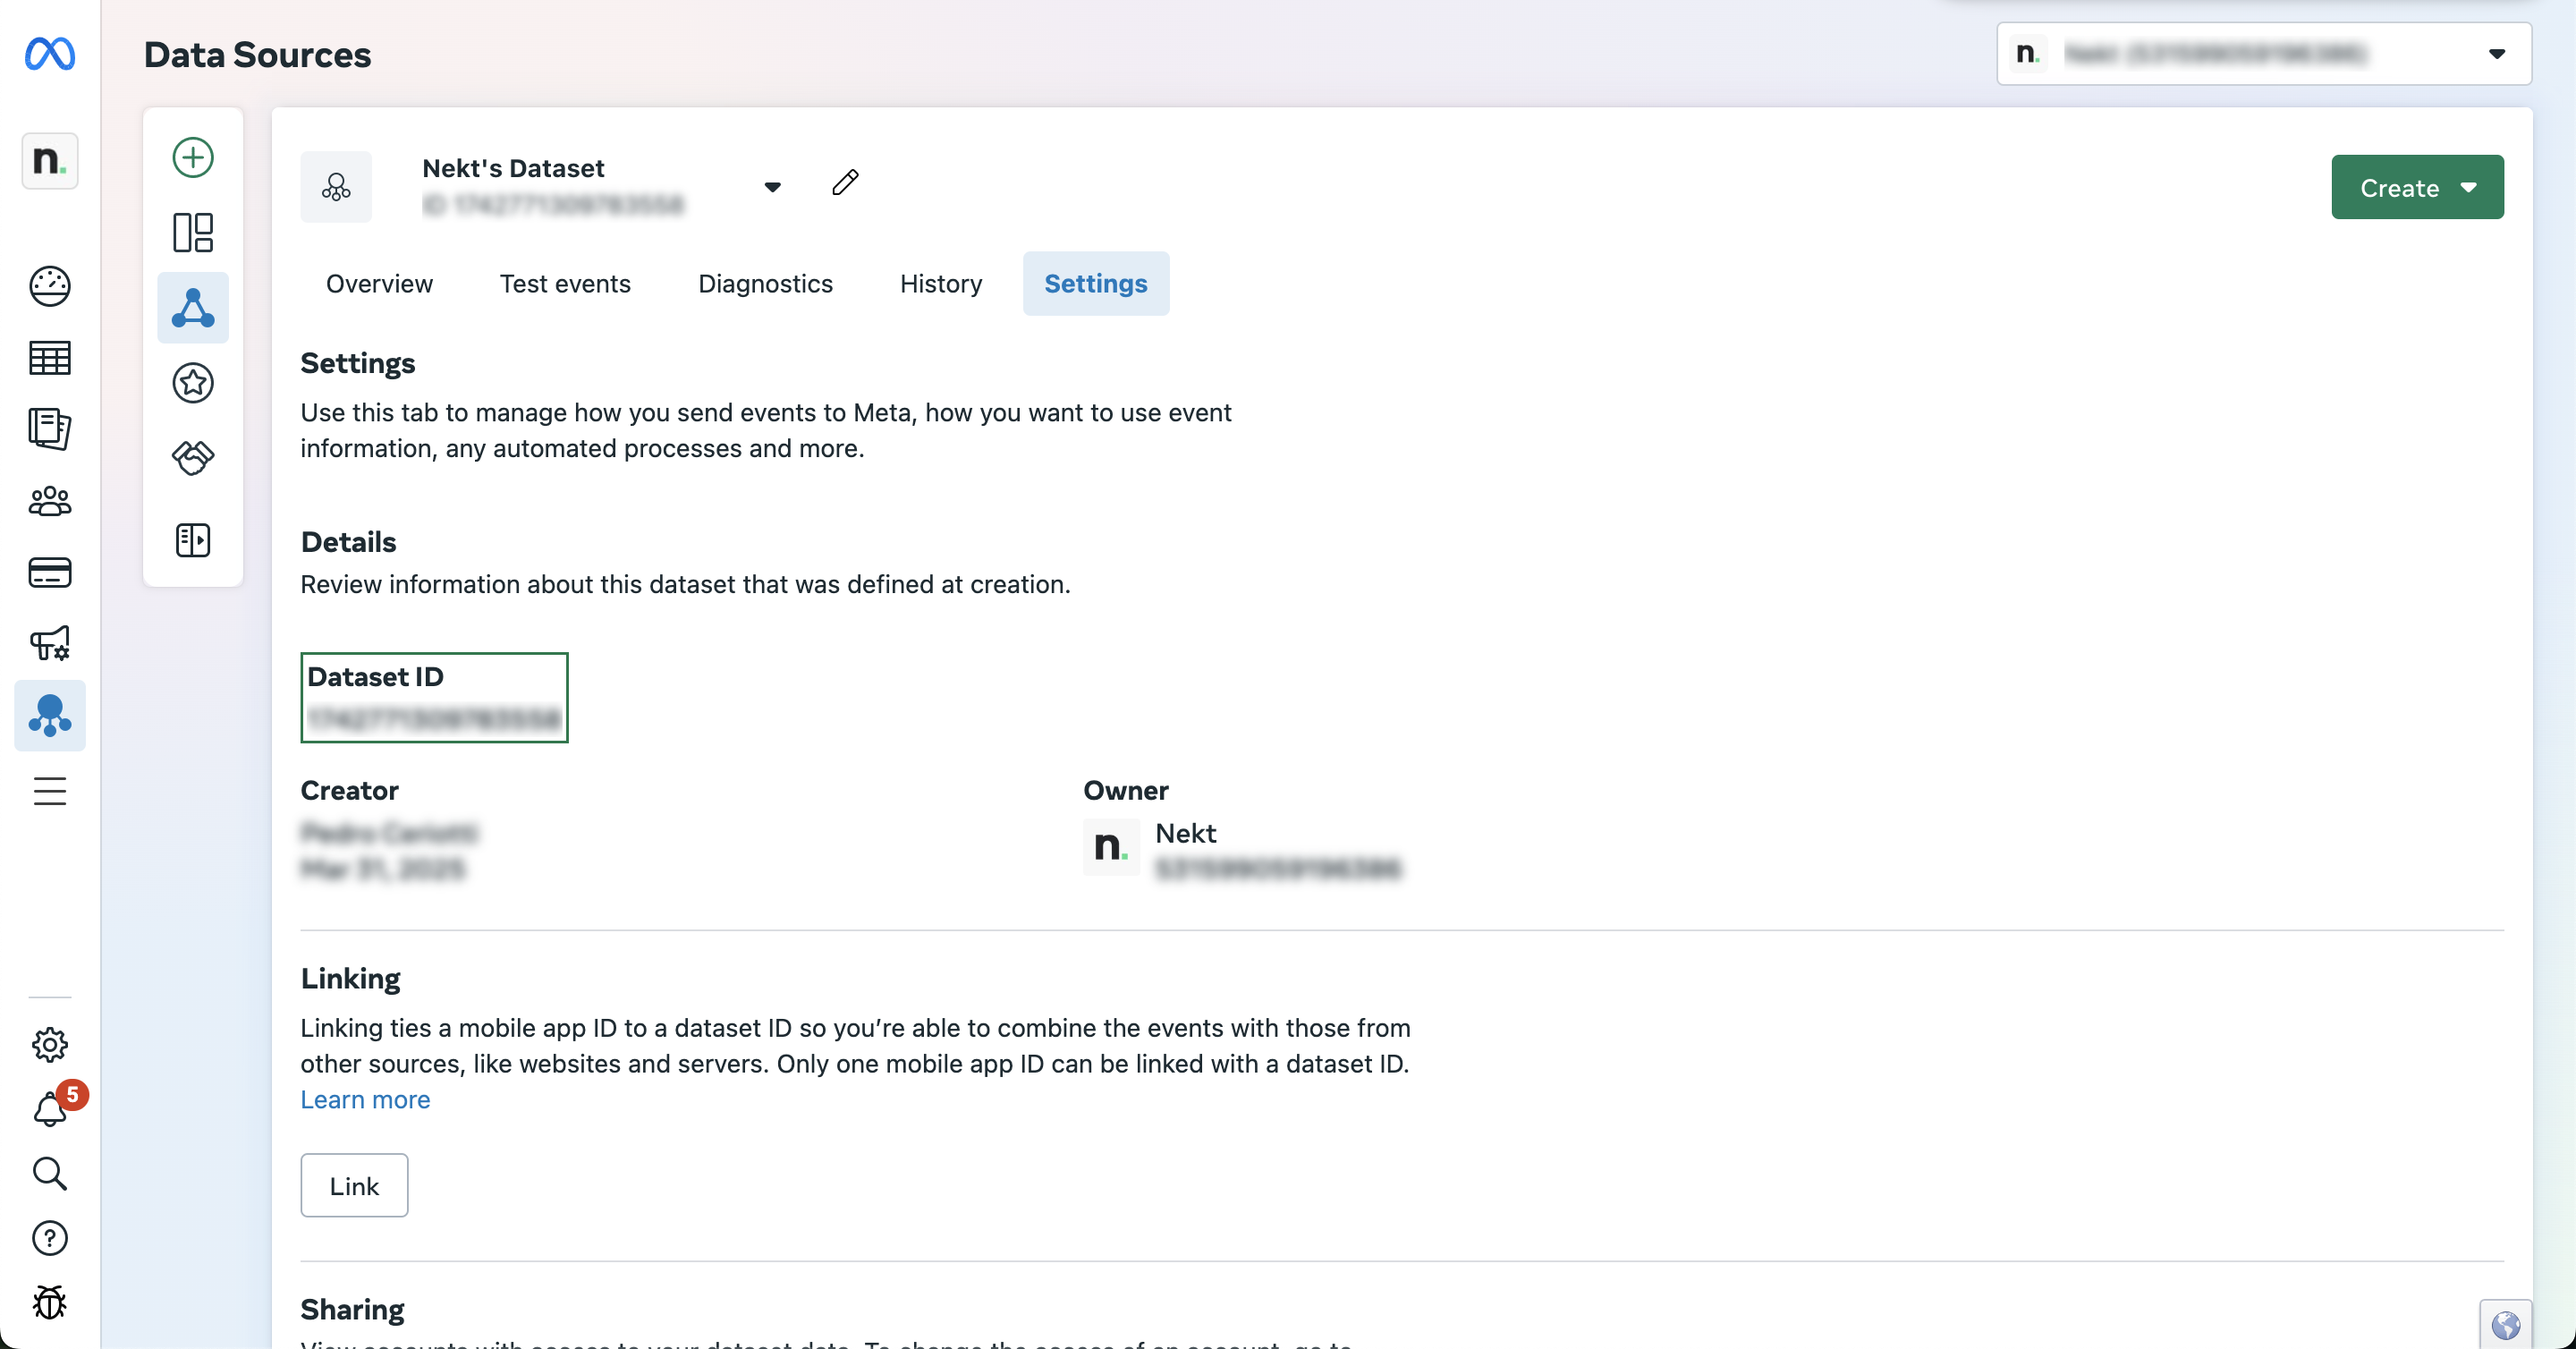
2
Generate an access token
Still in Events Manager, open your data source, go to Settings, and in the Set up direct integration section click Generate access token.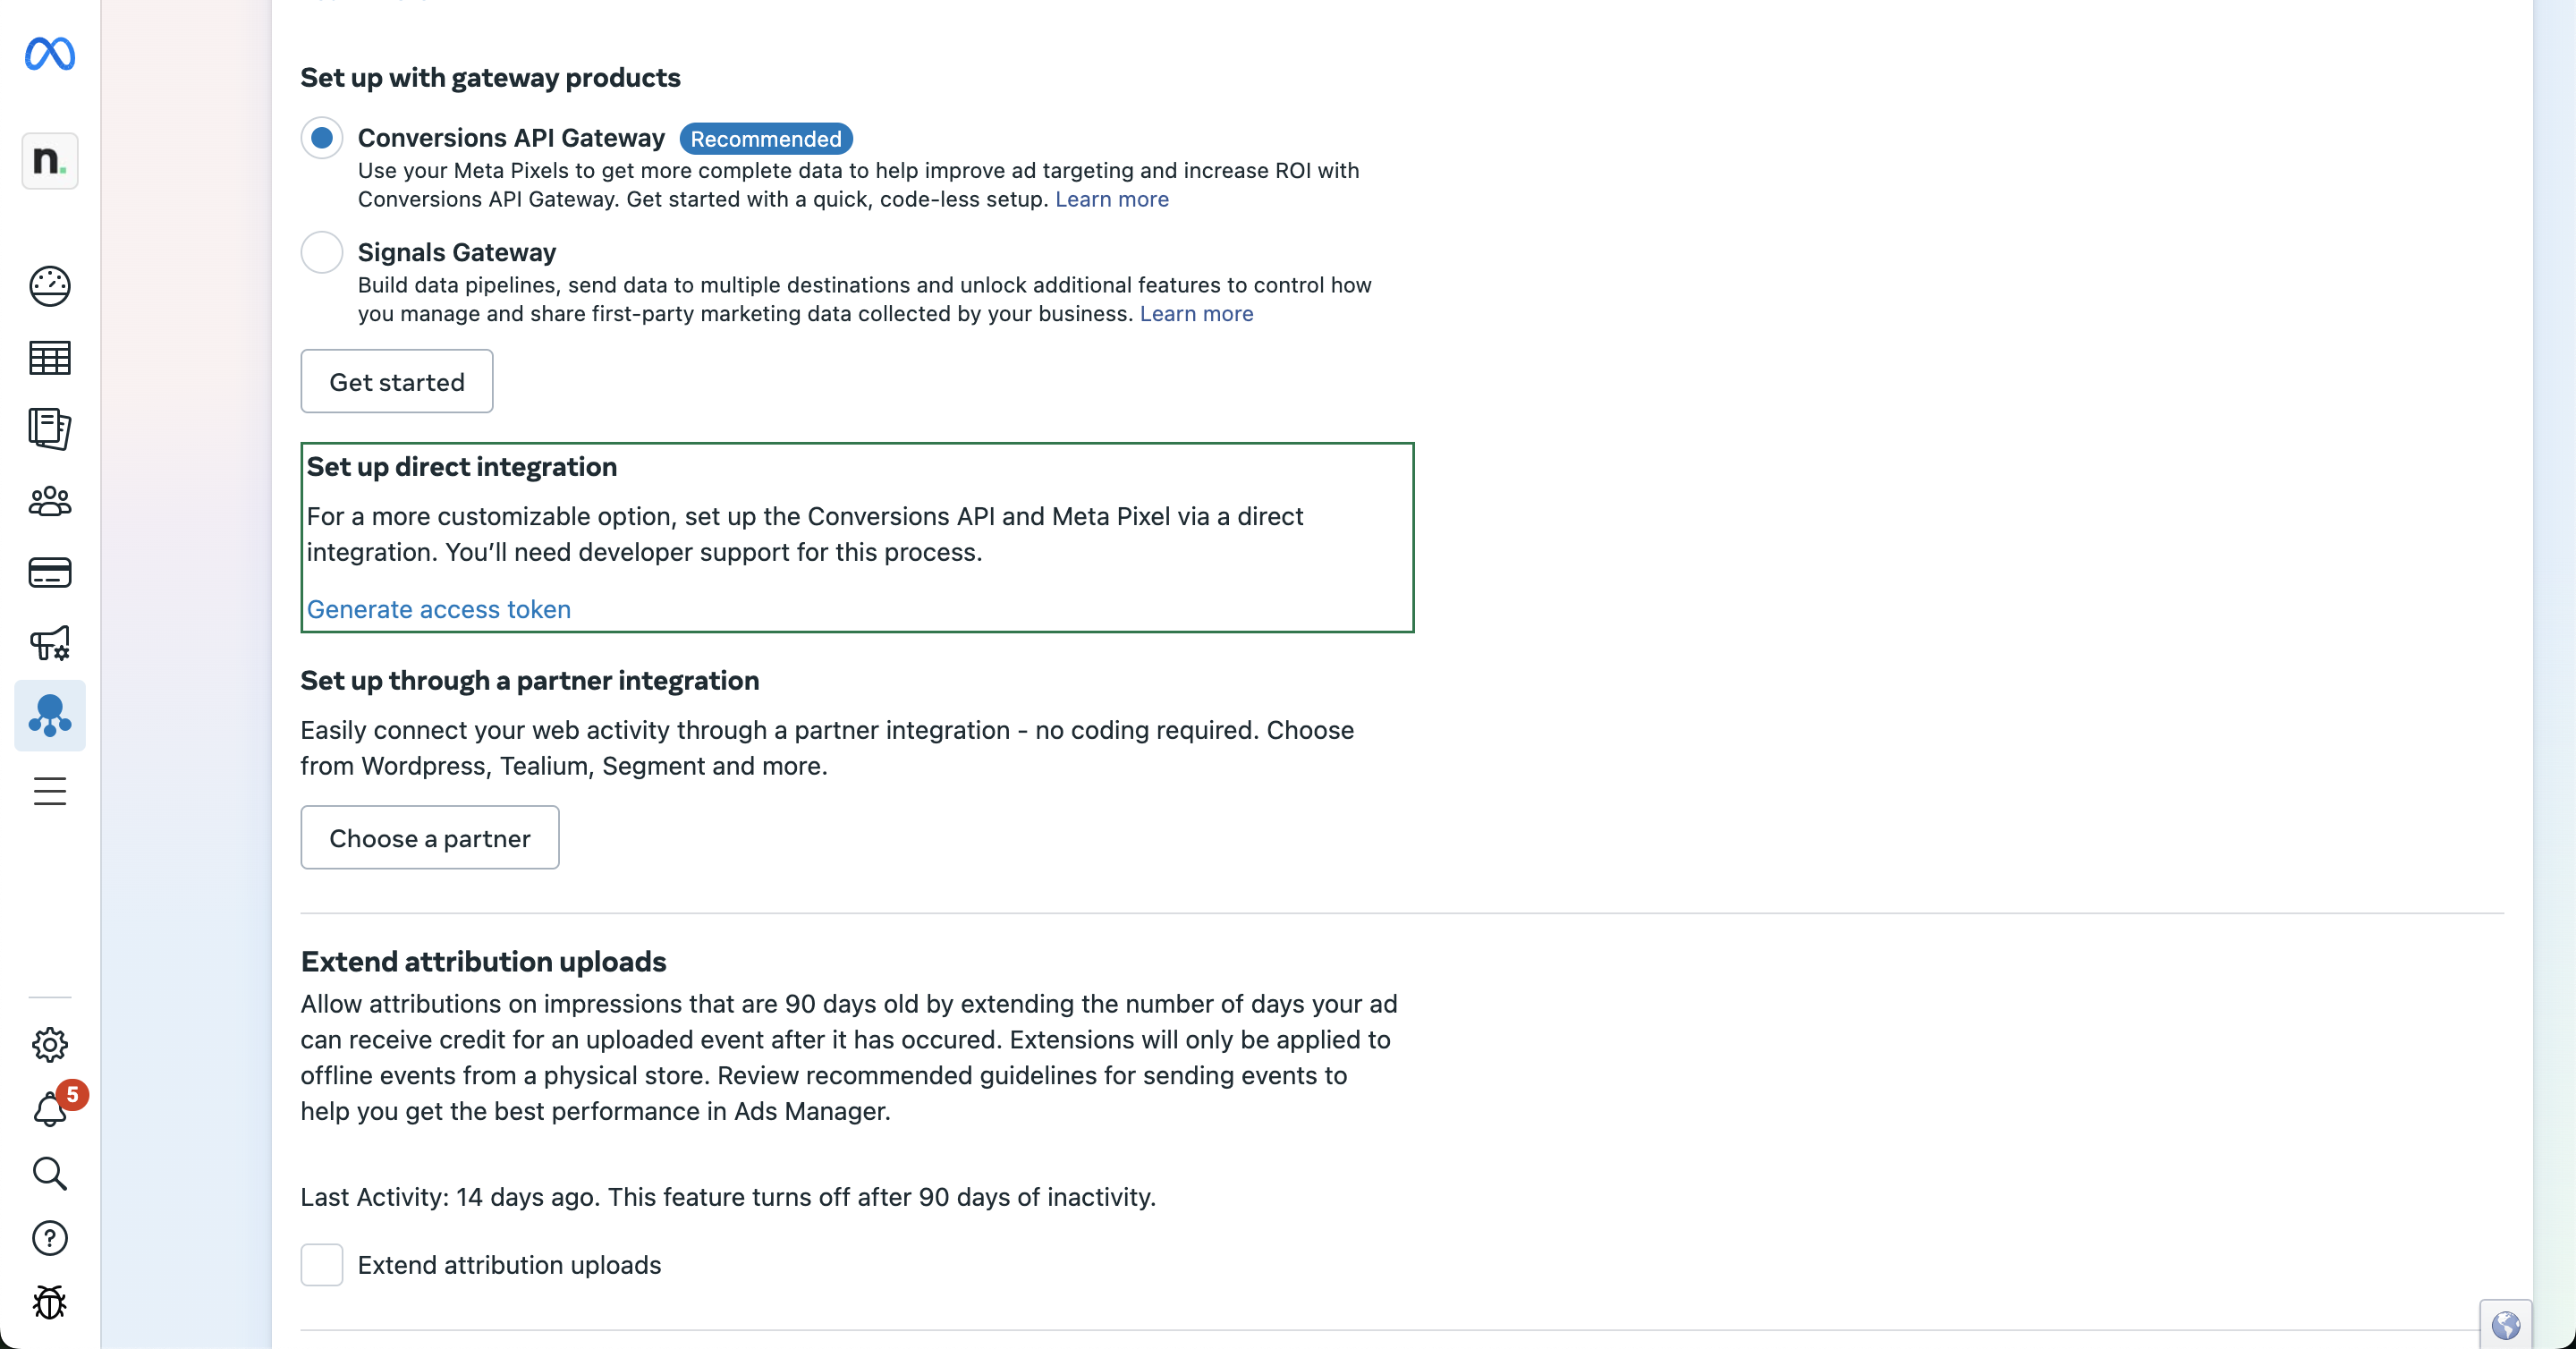
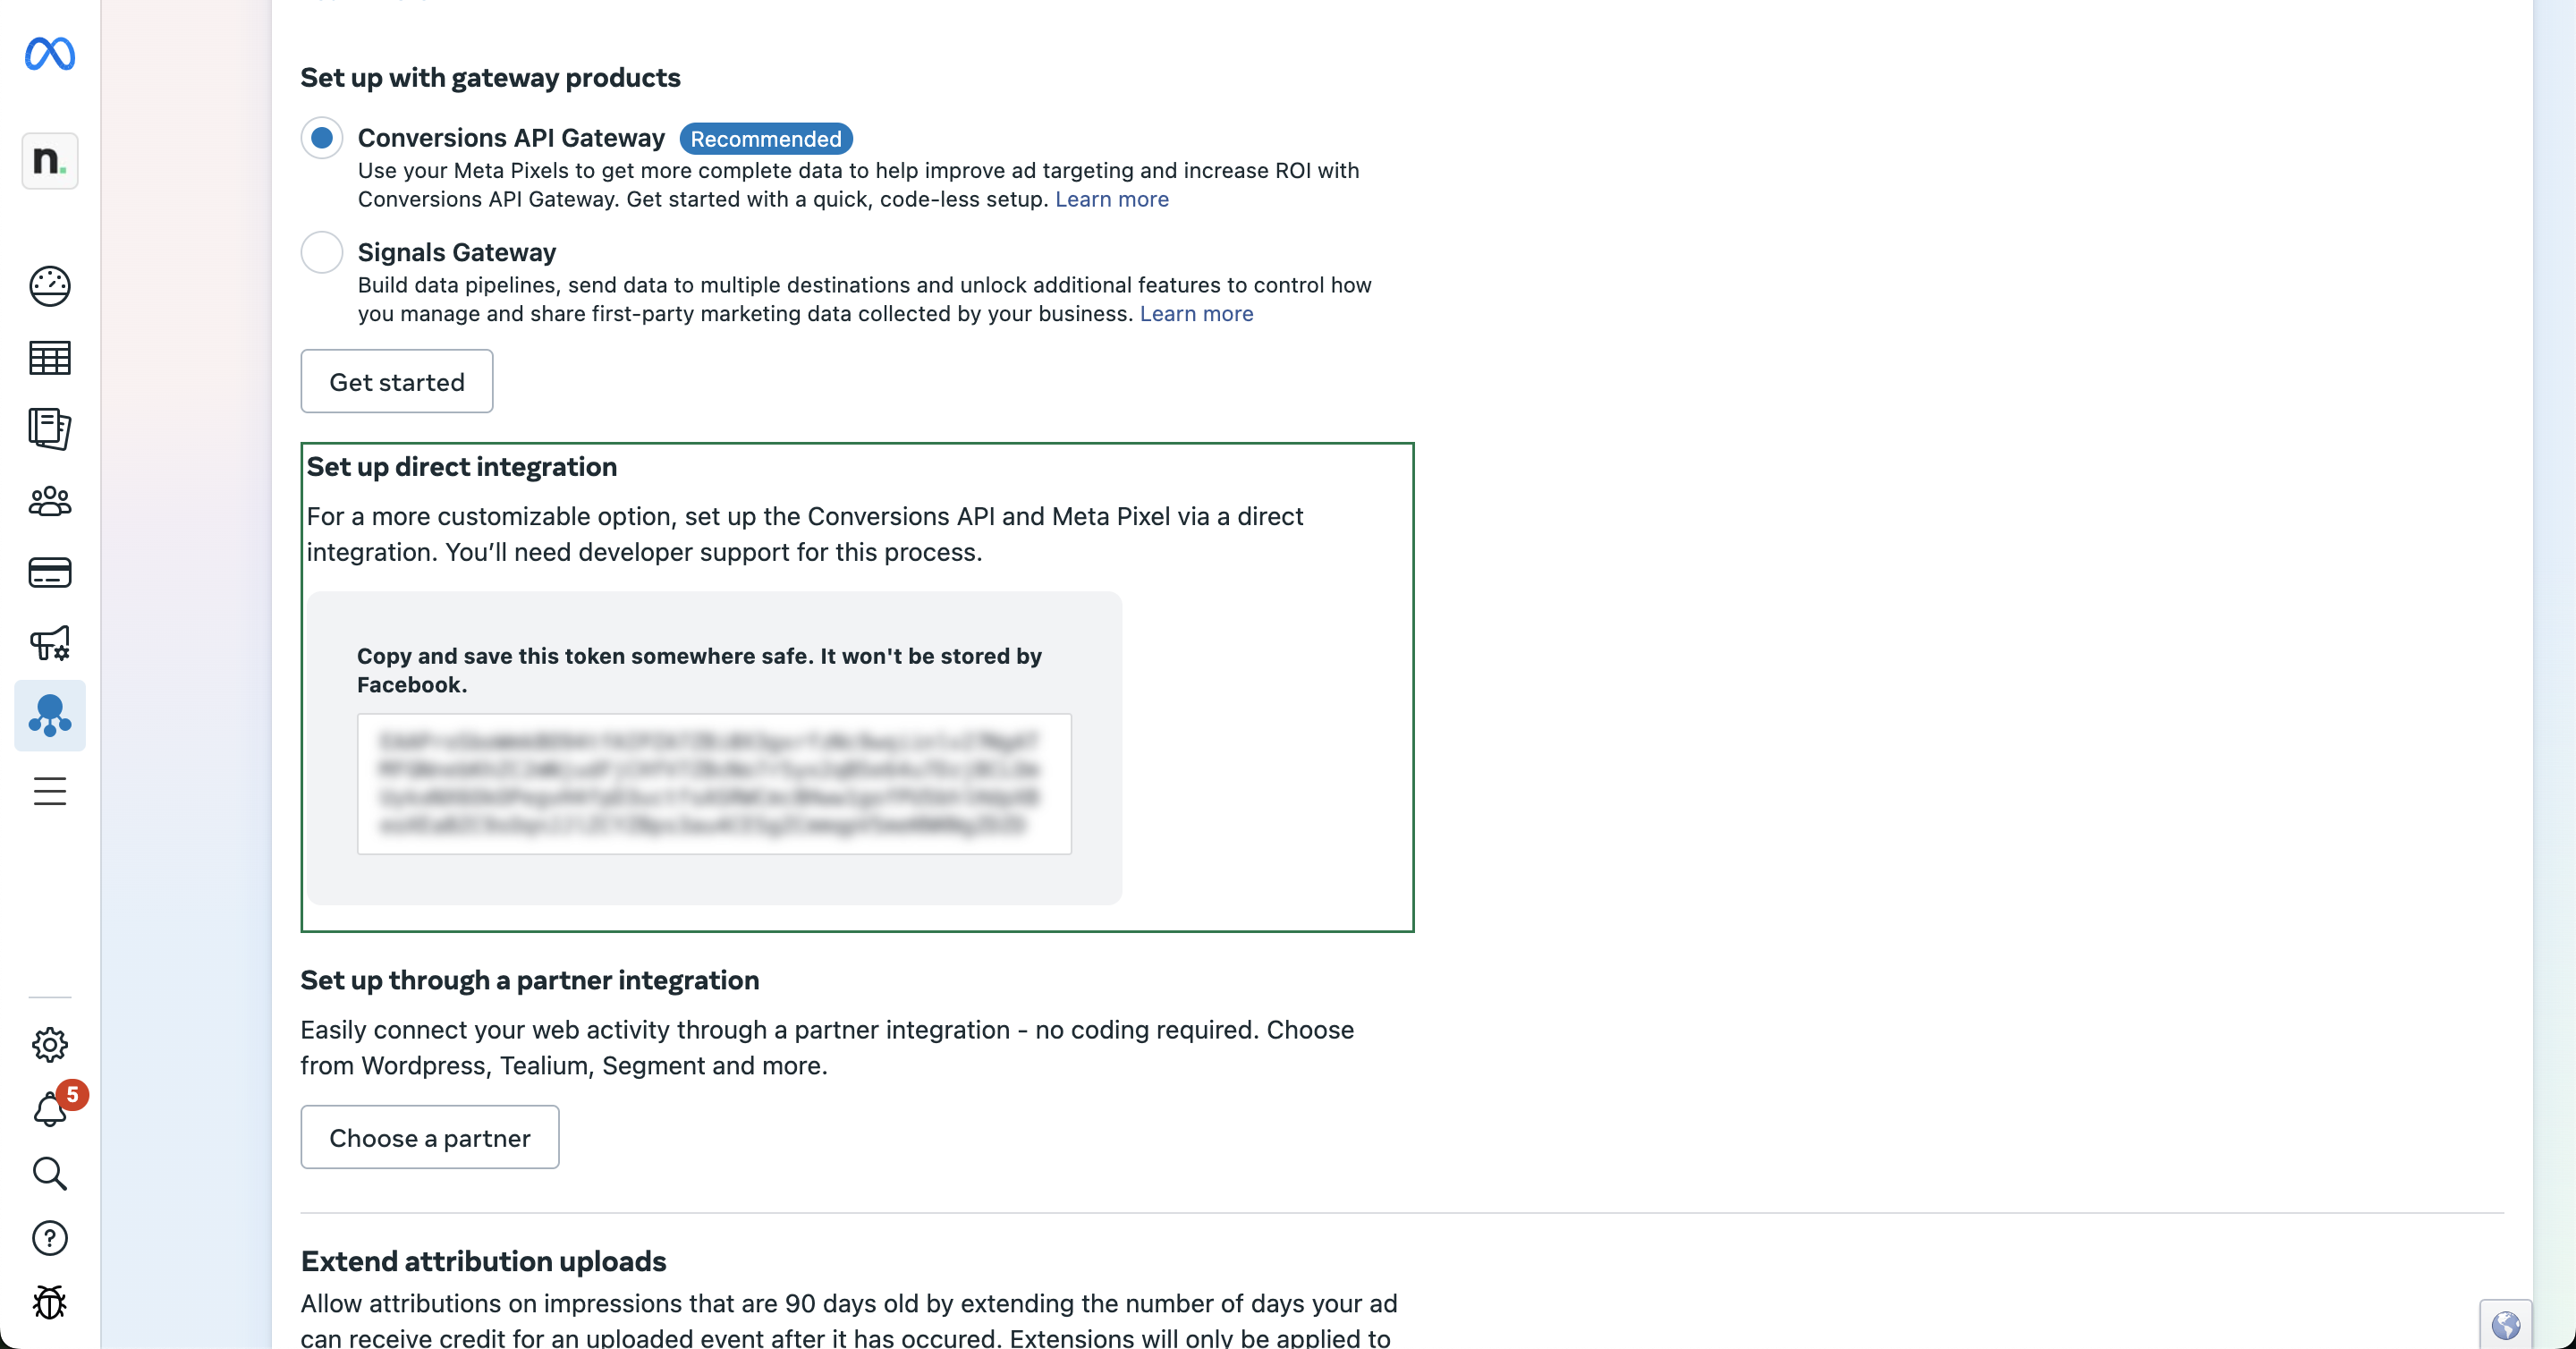
ads_management permission on the Business account that owns the data source.3
Decide your event name
Use a standard event name such as
Purchase, Lead, CompleteRegistration, or Subscribe when one fits. Standard events plug directly into campaign optimization and reporting. A custom name such as QualifiedLead also works, but you have to register it as a custom conversion in Events Manager before campaigns can optimize for it.3. Prepare your input table
This is where most of the work is. Build a table in the Catalog with one row per conversion event, then map its columns to Conversions API fields.How the mapping builds the payload
The Conversions API payload is nested, so destination field names use dots.user_data.em means “the em key inside the user_data object”. Nekt assembles the nesting for you.
A table like this:
mapped like this:
produces this request:
Normalize your values before they are hashed
Nekt hashes the value exactly as it appears in your table. It does not lowercase, trim, or reformat anything first.Maria.Silva@Example.com and maria.silva@example.com produce completely different hashes, and only the second one matches. Normalizing in your Query is therefore not optional.
Example 1: offline purchases from your ERP
The most common case. Orders paid in a store or by bank transfer, sent back so Meta can attribute them to the ads that generated the visit.The
INTERVAL 6 DAYS filter is deliberate. The limit is 7 days, and a run that starts near the boundary would otherwise pick up rows that expire mid-run and fail the whole batch. Keeping a day of margin makes the pipeline stable.Example 2: qualified leads from Meta Lead Ads
If your leads come from Instant Forms, your CRM has the Meta lead ID. Sending it back when the lead becomes qualified is the most accurate event you can produce, and it is what powers the Conversion Leads optimization goal.lead_id to user_data.lead_id, em to user_data.em, and value / currency to custom_data.value / custom_data.currency.
Example 3: web purchases deduplicated with the Pixel
If the Pixel already firesPurchase on your site, you can send the same event server-side to recover what the browser lost, as long as both carry the same event_id and event_name. Meta keeps the first copy it receives and discards the duplicate, within a 48-hour window.
Sending a list of products
custom_data.contents expects an array of objects. Build it in your Query with collect_list and named_struct, and map the resulting column to custom_data.contents.
user_data.em and user_data.ph: if a customer has more than one email or phone, an array column is accepted and every item is hashed individually.
4. Configure the destination
1
Add the destination
Go to Destinations, click Add destination, and select Facebook Conversions.
2
Fill in the configuration
- Pixel ID or Dataset ID: the ID from Events Manager.
- Access token: the token you generated.
- Would you like Nekt to automatically hash fields required by Facebook?: leave enabled unless your table already stores hashed values. It covers
user_data.em,ph,fn,ln,ge,db,ct,st,zp, andcountry. - Log request payload: writes the full payload of every batch to the run logs. Useful while validating a new pipeline, but leave it off in steady state.
3
Select your data
Choose the layer and the table you prepared, then click Next.
4
Map your columns
Map each column to a Conversions field, using the reference below.
event_name and event_time are required by Nekt, and action_source plus at least one user_data identifier are required by Meta.5
Name it and set a trigger
Describe the destination, set a trigger, and click Done. Daily is a good default. Optimization does not need events in real time, but do not let the schedule drift close to the 7-day limit.
5. Field reference
Event fields
Customer identifiers (user_data)
At least one identifier is required per row. Everything in the first table is hashed by Nekt before leaving your environment.
Hashed automatically
Sent as-is
Event details (custom_data)
App events (app_data)
Only relevant when action_source is app: app_data.advertiser_tracking_enabled, app_data.extinfo, app_data.install_referrer, app_data.installer_package, app_data.url_schemes, and app_data.windows_attribution_id. See Meta’s app events reference.
The field list also shows
app_data.application_traccking_enabled, whose name is misspelled and which Meta therefore ignores. Use app_data.advertiser_tracking_enabled.Correcting a previous event (original_event_data)
Used when the event you are sending refers to an event already reported, for example a refund pointing back to the original purchase: original_event_data.event_name, original_event_data.event_time, original_event_data.event_id, and original_event_data.order_id.
For the complete definition of every parameter, see Meta’s Conversions API parameters reference.
6. After the run
A successful run means Meta accepted your events. Processing and attribution happen afterwards.- Open Events Manager, select your data source, and check the Overview tab. Events usually appear within minutes, and can take up to 20 minutes.
- The Event Match Quality score, per event, tells you how well your identifiers are matching. Below “Good”, add more
user_datafields or double-check your normalization. - The Diagnostics tab reports issues Meta found in your payloads, including rows dropped after the request was accepted.
7. Troubleshooting
The run failed and the log shows an error from Meta
The run failed and the log shows an error from Meta
The connector stops the run as soon as Meta rejects a batch, and the log contains Meta’s raw response. The
message and error_user_title fields in that response name the problem. Enable Log request payload and run again to see exactly what was sent.Invalid parameter: event_time is too far in the past
Invalid parameter: event_time is too far in the past
One or more rows have an
event_time older than 7 days. Meta rejects the whole batch of 100 rows, not just the offending one. Add a date filter to your Query, keeping a day of margin: WHERE event_date >= current_timestamp() - INTERVAL 6 DAYS.event_time is in the wrong format
event_time is in the wrong format
It must be a Unix timestamp in seconds, as an integer. A timestamp column or a string date is rejected. Use
unix_timestamp(your_column). If your source stores milliseconds, divide by 1000.The run succeeds but Event Match Quality is low
The run succeeds but Event Match Quality is low
Meta accepted the events but matched few of them to people. The usual causes are values that were not normalized before hashing (an uppercase email, a phone without the country code), only one identifier per row, or pre-hashed values being hashed a second time. Compare a known customer’s hash against the value Meta expects, and add more identifiers.
Events arrive but campaigns do not optimize for them
Events arrive but campaigns do not optimize for them
A custom
event_name has to be registered as a custom conversion in Events Manager and selected in the campaign before it can drive optimization. Standard event names avoid this step. Also confirm the events landed on the Pixel or Dataset the campaign is actually using.Conversions are counted twice
Conversions are counted twice
The Pixel and this destination are both reporting the same event without a shared
event_id, or with an event_id that changes between the two. Deduplication requires the same event_id and the same event_name on both sides, and only applies within 48 hours.Invalid OAuth access token
Invalid OAuth access token
The token expired, was revoked, or belongs to a user who lost access to the data source. Generate a new one in Events Manager and update the destination configuration.
Related destinations
Facebook Custom Audiences
Build targeting audiences from your customer lists.
Facebook Campaign Management
Pause, activate, and rebudget campaigns from a table.
If you encounter any issues, reach out to us via Slack, and we’ll gladly assist you!